Mozilla Firefox Crashing or Quitting on Enterprise Website Login Panopto

If you’re using Mozilla Firefox for logging into a web-based enterprise resource (such as Panopto) and the browser crashes, you can try going to Help > Troubleshooting Information > and then click the Refresh Firefox button found under the heading “Give Firefox a tune up.”

However, if this does not fix the problem, you’ll need to completely remove Firefox and all settings files.

Use a program like Clean My Mac to thoroughly remove Firefox and all program settings. Then install it again. This will fix many website usage issues. However, any related web data data, such as cookies and saved passwords, will be removed.

Below is a screen shot of the Clean My Mac Uninstall utility. The related Firefox system files have been identified. Click the image for a larger view. The software conveniently finds and removes the Firefox settings files.

20150817mo0611-mozilla-firefox-complete-removal-settings-files

Microsoft Excel Style Colors Can Result in Lost Date Cell Formatting

Microsoft Excel has some nice pre-defined styles to easily and quickly highlight a group of cells, columns, or rows.

However, if you’re using these to mark your location in a sheet as you’re entering data or for some other temporary reason, a bug in Microsoft Excel 2016 (Apple Mac version) will cause the date formatting to be lost in any columns that were defined to be formatted as dates. So, the dates will be converted into a scientific notation equivalent number.

If this happens, you need to highlight the relevant column and then apply the cell formatting you’d prefer.

To avoid this problem, don’t use the predefined Excel styles. Instead, use the Fill color option found on the Home ribbon just to the right of bold/italic/underline. This can be applied and then removed without impacting the cell formatting.

Rename a Bluetooth Wireless Device on Apple

New Bluetooth devices from Apple may initially have a broadcasted name of their MAC address. This is a uniquely identifiable serial number given to every Bluetooth device. Usually once a device is paired, it’s then given a generic name such as Keyboard.

Follow these instructions to rename a device:

  1. On your Apple computer, from the Apple Menu choose System Preferences > Bluetooth.
  2. With a keyboard for example, presuming it’s not Paired yet, it should be viewable in the list of available devices. Click on the Pair button and type the number displayed on the keyboard. It should then be Paired.
  3. Right click on the device and choose rename from the pop-up context sensitive menu.
  4. Rename and click the Rename button.
  5. To pair it with another device, right click on the item in the list and choose Remove. You’ll be told that to use it again you will need to Pair again. Confirm this message.
  6. If it’s a keyboard, the green light above the CD eject button will blink rapidly. If it doesn’t, push and hold the power button to turn the green light off.
  7. Then, press and hold the Power button as well as the Esc key for about 5 seconds and let go. The green light should begin to blink. This means the keyboard is ready to be paired with a new device. It will connect using the new name.

Note that when a device is paired to an iOS device, renaming isn’t an option. Only through the desktop computer can you rename it.

Considerations for iOS Devices

You may notice that a renamed device still shows up under the old name. Here are the conditions when this will happen and how to correct for it.

  1. On an iOS device, click the information link for a specific Bluetooth device, and click Forget This Device. Then follow the instructions above to rename the device.
  2. After you’ve renamed the device on a desktop Apple computer, your iOS device may still recognize it by the old name because the Bluetooth address (a MAC address serial number) is still the same.
  3. Pair the device.
  4. Use the ‘Forget This Device’ option to remove it.
  5. Pair it again.
  6. This time the new name should be showing up.

Managing and Reducing Smart Phone Apps for iPhone and Android

Too many programs on a computer or mobile device use up storage space. Since mobile devices are generally more limited on storage, there’s even more reason to keep the list of installed apps to a minimum. Mobile devices also use up over-the-air mobile data plan quotas, and the updating process takes time and can slow down your device.

One approach to curating the collection of apps is to do it over time. As you’re notified of pending updates, review the programs that are being updated and consider if each program is really necessary.

Another approach is to conduct a complete inventory of programs installed on your device.

It’s common to ‘try out’ an app by downloading it and using it a little. Consider removing the apps that you tried and never used.

Some apps have duplicate purposes and uses. Consider reducing to the best one of the bunch.

Reducing apps can help declutter your screen, save space, save data usage, and speed up  your phone. You’ll be glad you did.

Windows 10 – Show My Computer Icon on Desktop

For decades, Windows has had the familiar My Computer icon on the desktop as a way to easily get to the hard drive, and with a right-click get access to more options.

With Windows 10, the My Computer icon is absent by default. This is presumably to keep users from accidentally accessing system files and causing problems on their computer. When enabled, the icon is called This PC.

To get the My Computer icon back, follow these steps.

  1. Right click anywhere in the desktop area to view a context sensitive pop-up menu (as shown below) and click on Personalize.

    20150809su-windows10-show-my-this-computer-on-desktop-001

  2. From the Personalization menu, choose Themes > Theme Settings. Click image for larger view.

    20150809su-windows10-show-my-this-computer-on-desktop-002

  3. Select the icons you would like displayed on the desktop for your user account. Click image for larger view.

    20150809su-windows10-show-my-this-computer-on-desktop-003

  4. Click the OK button when done and close out of the Personalization menu.

Windows 7 to Windows 10 Upgrade Considerations

Here are some points to keep in mind when considering an upgrade from Windows 7 to Windows 10.

Backup Before and After

The free upgrade offer for Windows 10 is only available for one year — presumably through 28 July 2016. If your upgraded computer crashes after that date, you’ll need to purchase Windows 10 to get it up and going again. In other words, it won’t upgrade to Windows 10 for free if you restore your computer to its ‘like new’ Windows 7 state. For this reason, it’s a good idea to create an image backup of your computer before and after the Windows 10 upgrade. This is something you’d want anyway, and with Windows 10 it ensures you can restore your computer to a clean Windows 10 installation.

Buy Used – Get Like New

Now is a good time to buy refurbished computers with Windows 7 installed. As long as the Windows 7 to Windows 10 free upgrade offer is in effect, it will be possible to purchase a Windows 7 computer at a significant discount and get it upgraded for free to Windows 10. If you decide to do this, you’ll want to make an image backup of your computer when it’s fresh from the store. This is just in case you decide to return to Windows 7. Then, once you’re done upgrading to Windows 10, make another image backup so you can always go back to the like-new Windows 10 installation. It’s best not to use the computer much or at all when you first purchase it. Instead, do the backups and perform all the essential updates and software installations first. This is explained in the Windows computer setup checklist.

Wait Times May Vary

Depending on your computer, there may be a wait time before Windows 10 becomes available. Then, you’ll need to wait while it downloads. Once it’s downloaded, you can begin the installation. Because there are millions of people at any one moment who all want their free copy of Windows 10, it may take a while for the availability and/or download of the software.

Disable TeamViewer at Startup on Windows or Apple Mac Computers

What Is TeamViewer?

TeamViewer is a secure and trusted software program that makes it possible to easily provide remote computer support and training.

Cost

TeamViewer is free for occasional users and to those receiving remote support.

Technical support professionals who use it to deliver support services will pay about $1,500 for the software, and then $500 a year thereafter if they want the newest version with more features.

Using TeamViewer for Setup or Maintenance

During the initial setup of computers, or periodic maintenance, it’s useful to enable the setting that allows TeamViewer to run each time the computer is turned on. That way, working on the computer remotely, it’s possible to install updates and perform the necessary restart of the computer without losing a connection. For those who want ongoing regularly scheduled maintenance and checkups for their computer, it’s useful to leave it running. Or, it’s possible to turn it on in preparation for regularly scheduled remote maintenance.

In some cases, a technician will help a customer with the setup of their office computer (for example), and then the customer will continue using TeamViewer to access their office computer from home. In such cases, TeamViewer could be left on and running automatically. However, it’s good to periodically update the software at home and work.

Disabling TeamViewer When Unused

When TeamViewer is no longer being used regularly, it’s a good idea to disable it from starting automatically. As with any other program, it takes up memory while running. At some point, the program becomes outdated, so there’s no reason to keep the old version anyway. Also, given that it’s a program for remote access, having it off when not needed is an extra measure of security. The rest of this document provides instructions on how to disable or remove it. The examples shown below are using screen images from version 10 of the software.

How to Disable TeamViewer for Windows

Follow these instructions to disable TeamViewer from loading when Windows starts:

  1. On your computer, click on the TeamViewer icon visible in the system tray as shown in the example below. It’s the icon on the left.
    20150802su-teamviewer-icon-in-system-tray-windows
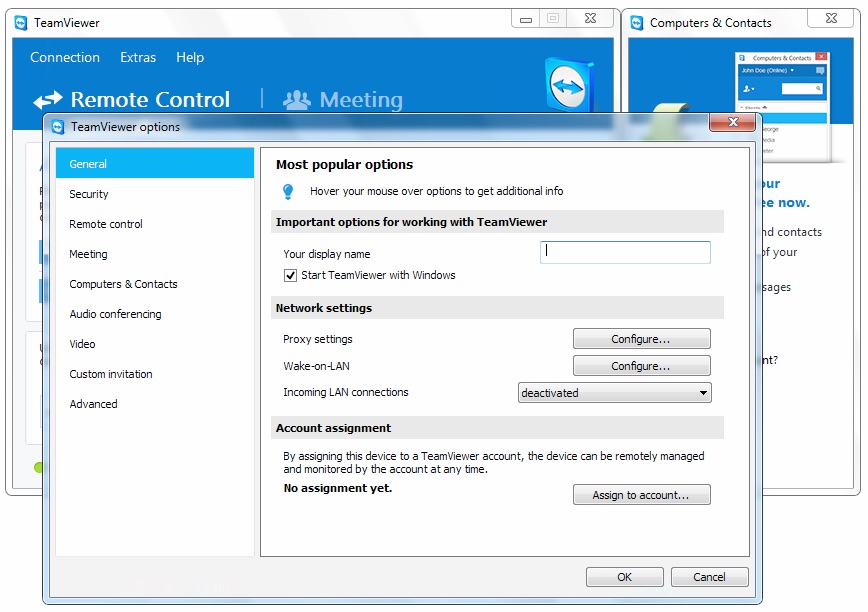
  2. When the TeamViewer window opens, from the Extras menu, choose Options and you should see a window like the one below. You’ll see a checkmark next to “Start TeamViewer with Windows” as shown in the example below. Remove that checkmark and click the OK button. Click the image below for a larger view.
    20150802su-teamviewer-settings-start-teamviewer-with-windows
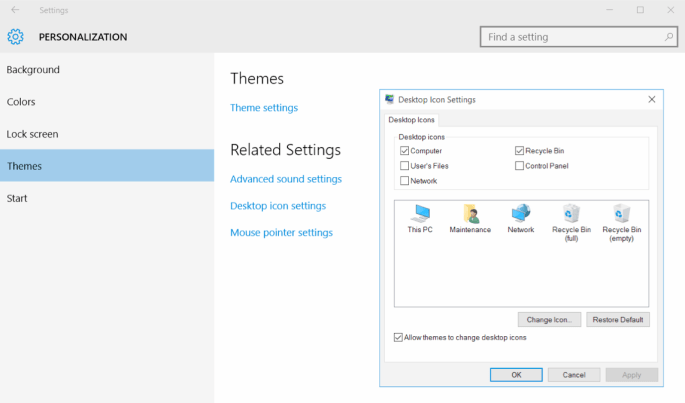
  3. Optional. If you don’t see the option to disable TeamViewer from running at startup, then simply remove the program. Since TeamViewer is free for non-commercial use, you can remove the software until you need it again. Go to Control Panel and under Programs (or Programs and Features) choose to uninstall TeamViewer.

How to Disable TeamViewer for Apple Mac

Apple computer users can disable TeamViewer from running at startup by following these instructions.

  1. Click on the TeamViewer icon in your Dock as shown in the example below to the right of the Finder icon. Or, you can find TeamViewer in your Applications folder and click on it there.
    20150802su-teamviewer-icon-apple-mac-dock-finder
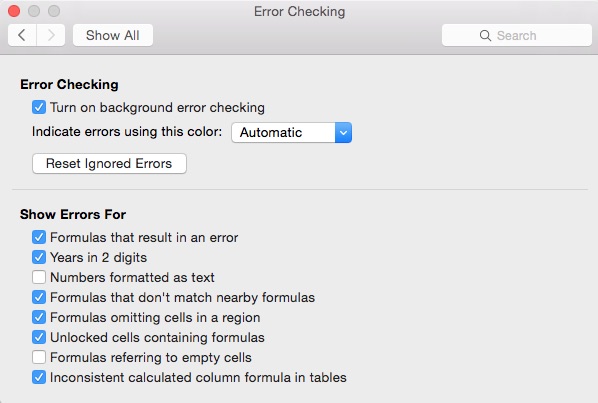
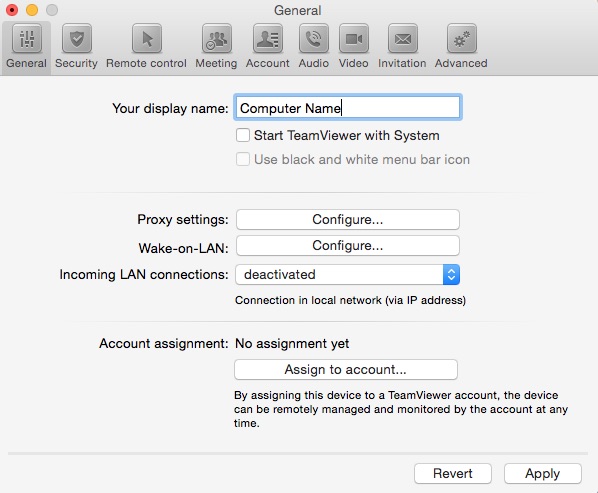
  2. From the TeamViewer menu, choose Preferences. Under the General settings, you’ll see an option to “Start TeamViewer with System.” Remove the checkmark as shown below and then click the Apply button. You can now quit the TeamViewer program. Click the image below for a larger view.
    20150802su-teamveiwer-apple-mac-disable-at-startup-settings-preferences
  3. Restart your computer to verify that the TeamViewer software isn’t running automatically.

TeamViewer Mac – Removal

  1. To remove TeamViewer, turn off the “Start TeamViewer with System” feature shows above.
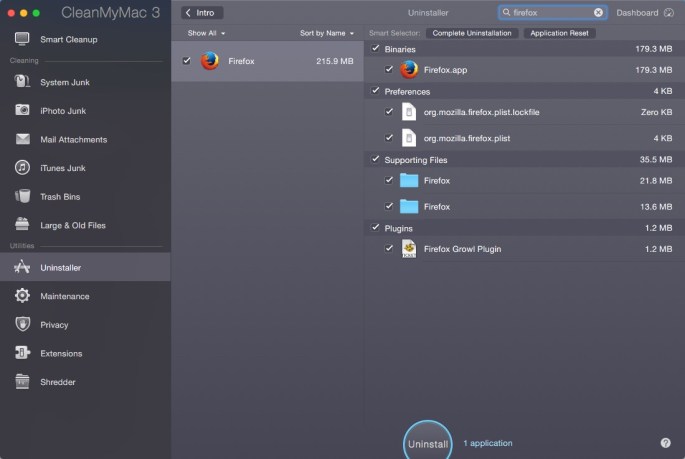
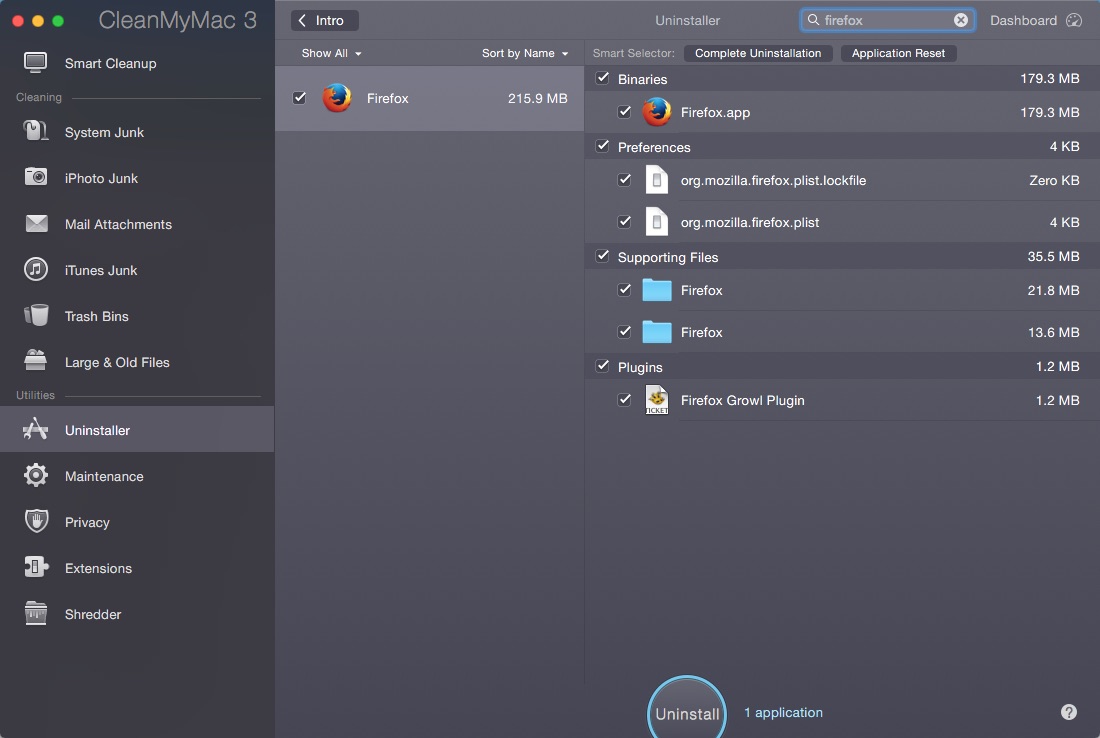
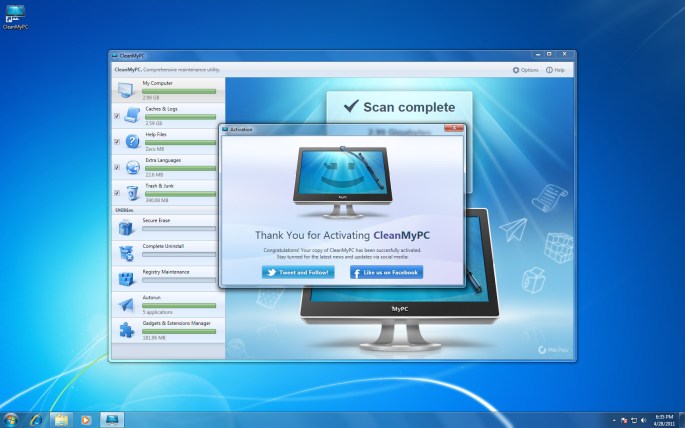
  2. Download and install CleanMyMac.
  3. Use the Application Removal utility in CleanMyMac to perform a complete removal of TeamViewer. This is necessary for just about any program on Apple computers since there’s not a removal option for most programs.

Note: If you already tried to remove TeamViewer previously by dragging it to the trash, reinstall the latest version and then follow the three steps above to remove it completely.

Microsoft Excel 2016 for Mac – Error Checking Numbers as Text

By default, Microsoft Excel has error checking that will place a warning indicator next to all cells that have numbers in a cell formatted to be text. It’s common to have serial numbers and other entries that will contain text and numbers in the same field, so having a warning about it is unnecessary.

To disable this and turn it off, in the Mac version, go to the Excel Menu and choose Preferences > Error Checking > and remove the check next to “Numbers formatted as text” as shown below.

20150801sa-microsoft-excel-error-checking-numbers-as-text

CleanMyPC Device Cleanup to Remove Apple Spotlight and Trashes Files

When using external hard drives or USB flash drives between Apple and Windows computers, you’ll notice in Windows there are some temporary Apple files visible. The Device Cleanup feature in CleanMyPC software utility suite can easily cleanup unnecessary files as shown below.

Before

20150721tu-cleanmypc-device-cleanup-before

After

20150721tu-cleanmypc-device-cleanup-results

CleanMyPC Main Screen

20150722we-cleanmypc

The $200 Computer With a 10-Year Warranty

There are five Goodwill Reboot stores in the nation. Iowa City is fortunate to be home to one of these authorized computer refurbishing  centers. We also have some other good sources of refurbished computers such as Midwest Computer Brokers.

This month, you can purchase a Windows 7 computer for about $200 and then on July 29, download and install the free Microsoft upgrade to Windows 10. (Learn More)

According to the Microsoft Windows lifecycle fact sheet, Microsoft will offer mainstream support for Windows 10 through 2020 and extended support through 2025.

So, theoretically, if your computer keeps running, which it should, you’ll receive the essential updates needed to keep the computer going for ten years.

Instructional Video

Upgrade Requirements

If you don’t see the Get Windows 10 app (the small Windows icon in your system tray), it might be because:

  1. Your device isn’t up-to-date with at least Windows 7 SP1 or Windows 8.1 Update
  2. Windows Update is turned off or is not set to received updates automatically
  3. You’ve blocked or uninstalled the necessary Windows Update functionality.
  4. Your device is not running genuine Windows
  5. Your device is running Windows 7 Enterprise, Windows 8/8.1 Enterprise, or Windows RT/RT 8.1, which are excluded from this reservation offer.
  6. Your device is managed as part of a school or business network. (Check with your IT administrator.)
  7. PCs that we determine cannot run Windows 10 will not see the Get Windows 10 app before July 29th. After July 29th, we’ll enable the icon in the system tray. This is to help ensure that you can easily check your PC’s compatibility if you choose.