
Follow these instructions if you’re upgrading or replacing an iPhone.
- Backup. Backup your current (old) phone using iTunes. You may already have an iCloud backup, but a local backup will be a faster method. This will require synchronizing the phone which may involve transferring purchased or upgraded apps to or from the phone. You may also be prompted to perform any updates for the phone. It may be faster to use iTunes (and a fast Ethernet connection) to download the latest updated apps. Once everything is updated in iTunes and on the iPhone, and backed up, you are ready for the next step.
- Logout of iCloud. Logout of your iCloud account on the iPhone. Without doing this, Apple will still have a record of the phone as being assigned to your iCloud account and nobody else will ever be able to use the phone until it is deauthorized and disconnected.
- Secure Erase. From Settings > General > choose to Reset all data and settings.
- Restore Backup to New iPhone. You can now restore the backup made in step #1 to the new replacement iPhone. Start iTunes and connect the phone. You’ll see a message in iTunes stating “Welcome to Your New iPhone” and “Restore from this backup” will have the most recent backup selected. You may also see a message stating that an update is available for the phone. You screen may look like the one below. Click the image for a larger view.

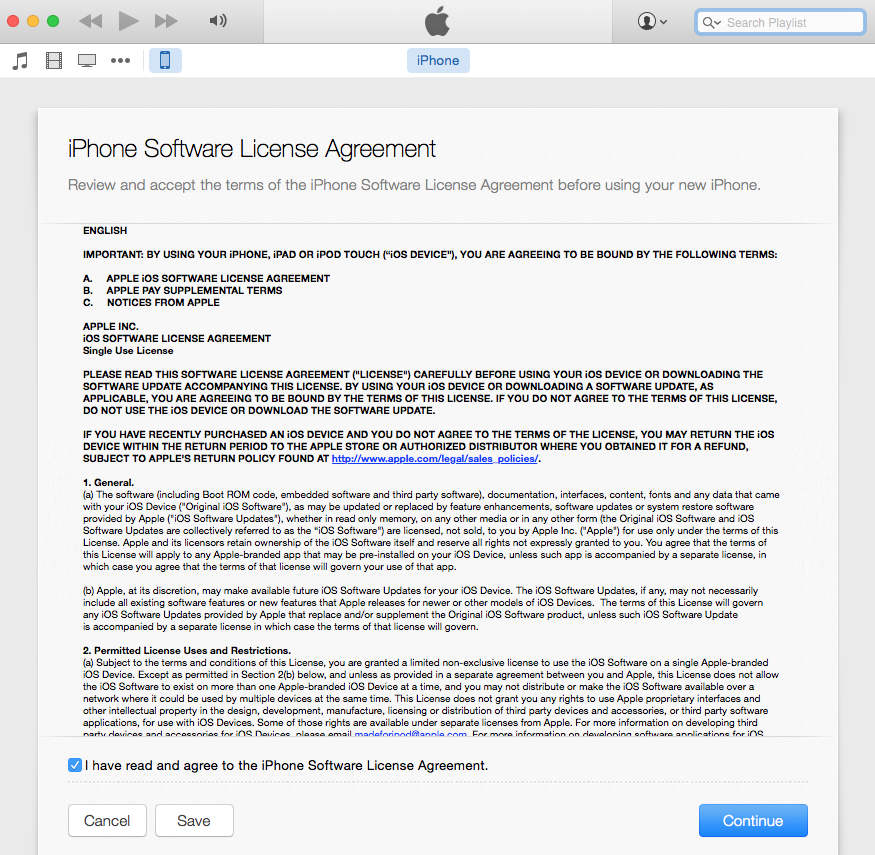
- License Agreement. Accept the license agreement by checking the box and clicking Continue as shown below. Click the image for a larger view.

- Restore Progress. You’ll see a message, “Restoring iPhone from backup” with the estimated time remaining as shown below. The time remaining may fluctuate during the restore process since it is an estimate based on the current transfer process.


- Restart. After the iPhone is restored, it will be restarted.
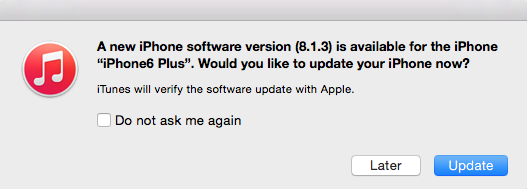
- Available Updates. Even though the phone is new, you may be reminded of available updates. It’s common that new computers and devices need updates after purchase. Examples of update notifications are below. You can ignore or cancel these for now. If you have an option to download only, you can choose that.


- Initial Setup Wizard. When your phone has restarted, it will still say “Hello” as if it’s a brand new phone. This is because the initial startup sequence hasn’t run yet. Walk through the navigated guide to perform the initial setup. You can setup the touch ID (fingerprint access) during the phone setup process, or you can do it later.
- Account Passwords. You’ll be asked to enter the passwords for all your email accounts, social networks, and other online accounts. This is to avoid someone restoring your backup to a device and having full access to any accounts with saved passwords.
- Synchronize Apps. The restoration process will involve copying all apps from iTunes back to the iPhone. The reason this happens is because the iPhone backup does not seem to make an extra copy of the apps during the backup process (since they are already in iTunes or available in the cloud). So, the iPhone backup contains your unique user settings and data. The synchronization process may take a while if you have many apps and/or larger apps.
- Google Accounts. For Gmail accounts that have additional security measures enabled, you may need to generate a password from the app passwords generator. These are found under your Google Account security settings. You can delete (revoke) any previous access codes generated for your old phone.
- Facebook. For Facebook accounts that have additional security measures enabled, the Facebook app may prompt you to enter a uniquely generated password key that will be sent via SMS.
- Update. After your phone has completed the initial synchronization, this would be a good time to perform the iOS update if available. Even if your old phone had the latest iOS, your new phone, even though restored from a backup, may not have the latest iOS, and since this isn’t part of the backup/restore image the update will need to be done manually. You can perform an iOS update from within the phone under Settings > General > Software update. Or, you can do it from within iTunes under the iPhone page.
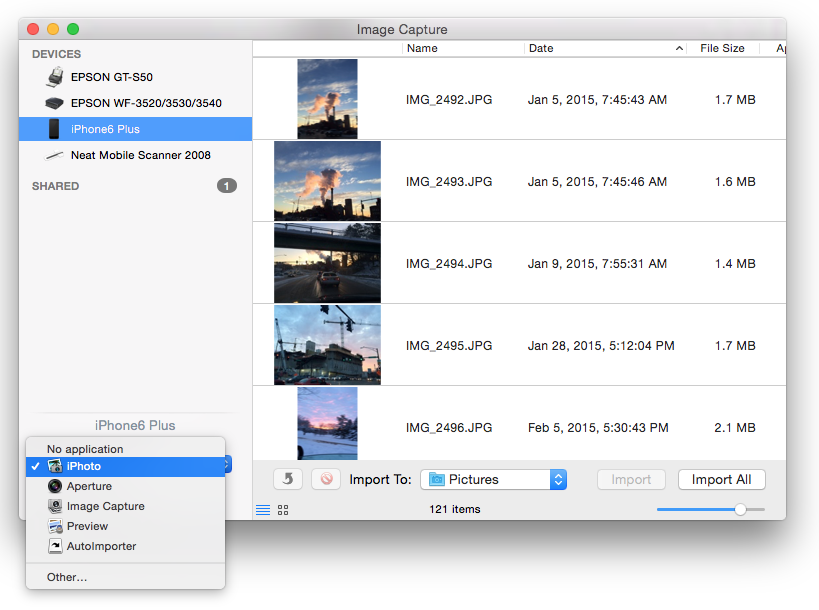
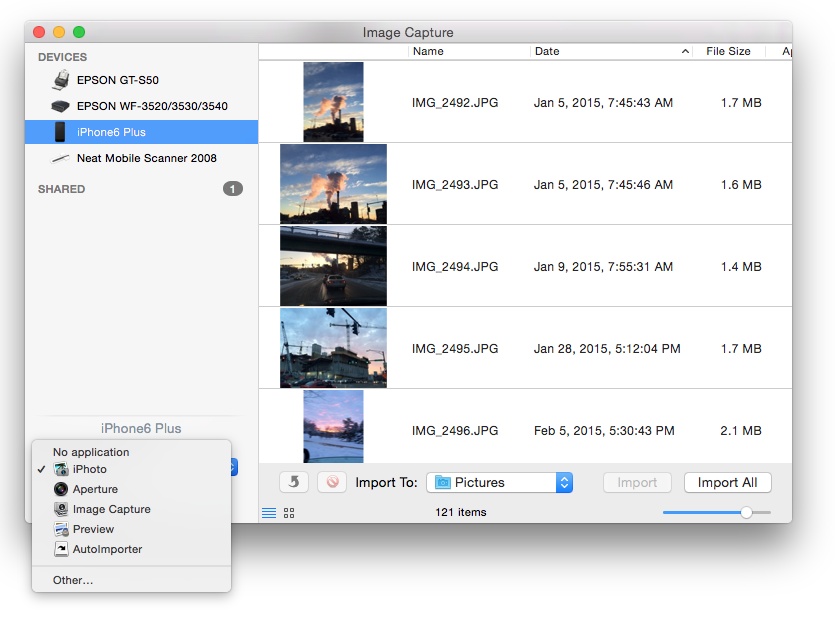
- Disable iPhoto Launch. By default, your phone may automatically launch iPhoto when it is connected to your Apple computer. To disable this, close out of iPhoto and open Image capture from the Applications list. Select your device, and then expand the options window in the lower left corner by clicking the tiny triangle in the box as shown below. Click the image for a larger view.


- From the options menu, under “Connecting this iPhone opens” choose “No Application” from the drop-down menu as shown below. Click either image for a larger view.


- Connection Error. At some point along the way you may see a connection error like the one below. If so, click the OK button. Exit iTunes and start again. You should be able to connect. Make sure the phone is on and logged in when starting iTunes.

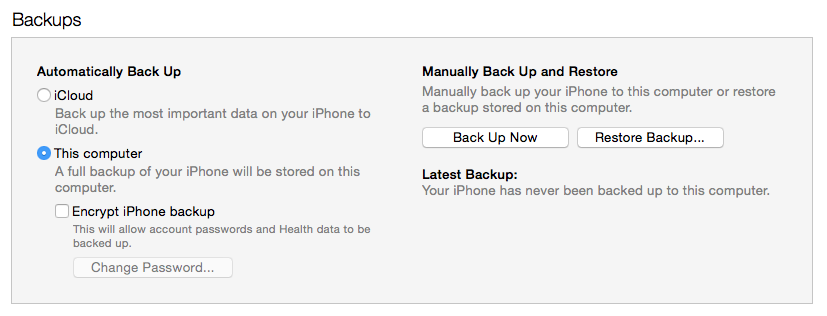
- Backup. After performing all of the above steps, you may not yet have a backup of your new device. From within iTunes, on the device page, under Backups, choose to backup to ‘This computer’ and click on the ‘Back Up Now’ button under ‘Manually Back Up and Restore.’ Click the image below for a larger view.


At this point, you new phone should be setup, backed up, and ready to use.
