Tech Tip: Focus Without Distractions Using Driving Mode All Day Long

Here’s a great way to stay focused, distraction-free, and be productive all day when you have big projects that require creativity and concentration.

In addition to using Driving Mode while driving, you can use it anytime you want to focus and automatically notify people that you’re not available. This and some other suggestions below can help you stay focused.

These tips assume you are using an iPhone, but similar features should be available on phones with Android.

  1. GREETING. Set an outgoing message to let people know you’ll be unavailable, and perhaps indicate when you might get back to them.
  2. DRIVE MODE. Set your phone to Driving Mode and enable an automatic reply for text messages to let people know you’re unavailable.
    • CONTROL CENTER. On an iPhone you can go to Settings > Control Center > and add an icon for Do Not Disturb While Driving. Then you’ll have easy access to enable Drive Mode.
    • ACTIVATION MODE. Then, go to Settings > Do Not Disturb > to set the Activation to Manually. This allows you to turn on Driving mode any time.
    • AUTO REPLY. Then set the Auto-Reply text message, such as “I’m unable to respond at the moment. I’m either driving, in a meeting, or you’ve reached me after hours. I’ll try to get back to you as soon as possible. Thanks!”
    • ALLOW FROM. In the Do Not Disturb settings you’ll see an option to Allow Calls From certain callers so you won’t miss an emergency call. Or, for repeated calls from the same person within three minutes.
  3. MUTE. Mute sound effects on your phone. This will silence notifications and other distractions. The Drive Mode should already have enabled the Do Not Disturb mode.
  4. WATCH. On your smartwatch enable Do Not Disturb, Theater Mode, and Silent Mode. Place your smartwatch with the screen away from you to avoid distractions from on-screen notifications.

Special Considerations

While in Drive Mode your smartphone will usually prevent any interaction, since most cars provide an on-screen display for answering phone calls and using map navigation. The phone itself will not be usable, so if your work requires use of the phone these tips won’t work.

You could consider having a secondary phone, either on a phone plan or without a phone plan using WiFi only, to continue with iOS or Android tasks and not be interrupted by calls or text messages.

Android Google Fit App – How to change distance units from kilometers to miles

The Google Fit app is available on Android phones to keep track of your exercise and activity throughout the day. If you don’t see it installed, go to the Play Store to install it.

Setting Distance Units

The setting for distance units may show up as kilometers. Follow the steps below to set distance units for the Google Fit app.

STEP #1

Start at the main screen for Google Fit as shown below.

STEP #2

Tap on the Profile icon in the lower right corner. This will reveal the main Profile screen as shown below. Note that personal entries below have been hidden.

STEP #3

Tap on the gear icon in the upper right corner. This should reveal the Profile Settings options page as shown below.

STEP #4

Tap on Distance to reveal a pop-up selection menu as shown below. Then select Miles (or Kilometers) to set your preferred unit of measure.

STEP #5

Confirm your selection. You will be returned to the Settings page where your new Distance selection will appear as shown below.

Further Reading

Some people who have Android phones may not be aware that the operating system on their smartphone is called Android. Examples of Android phones would be smartphones such as the Samsung Galaxy, Motorola Moto, Google Pixel, LG, or some other brand and model.

This document refers to Android 8 – Oreo. This is the version currently installed on Moto G6 phones. At present, the current version is Android 9 – Pie. Presumably these instructions would work with some older or newer versions of Android.

Unable to login to Starbucks app – SOLVED

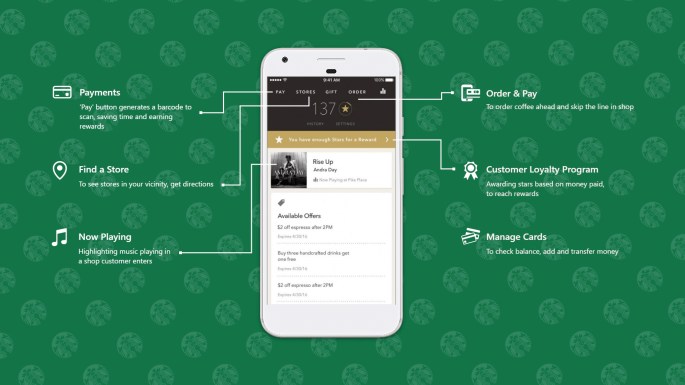
Many people have recently had trouble logging into the Starbucks app. Deleting the Starbucks app and then reinstalling it has been known to solve the login problem.

Note: If you tried multiple incorrect passwords to access the app, you may be locked out. According to Starbucks customer service, there is a 24-hour lockout period although the app will not give you any indication you’re locked out. However, reinstalling the app is the best way to ensure best results.

If you’re on a smartphone and login to the Starbucks website, it’s possible to use the mobile version of the website to make purchases using your Starbucks card. It’s also a way to confirm that your username and password are working correctly.

If this works for you, or doesn’t, feel free to post your experience in the comments below.

Thanks!

20180823th0851-starbucks-app-login-not-working-features

Apple Pay Cash Promo Video Misses Critical First Step of Instructions

With the value of Bitcoin having gone from about $4,000 to $15,000 in recent weeks, there’s  been an increased interest in person-to-person payment systems. Demand for simplified payment systems is at an all time high. On 6 December 2017, Apple announced Apple Pay Cash, a peer-to-peer payment system.

This announcement came just hours after news of a major heist in the cryptocurrency world that resulted in numerous people collectively losing over $50M in money. No doubt, consumers will be looking for more secure ways to exchange money with friends and family.

In the video below, that was posted on YouTube for Apple’s 5.6 million subscribers, the simple instructions leave out a very important step. The user must upgrade their device to Apple iOS 11.2 which adds the Apple Pay Cash capability. At present, over 75,000 people have watched the video and were likely perplexed by it since most people will not have performed the upgrade. Some older devices can’t be upgraded to iOS 11.2 so Apple Pay Cash won’t ever work on those devices.

To enjoy Apple Pay Cash, follow these steps:

  1. Go to Settings > General > Software Update
  2. Click Download and Install
  3. Enter your passcode
  4. Agree to the Terms and Conditions
  5. The update will download.
  6. Then the update will install.
  7. You’ll get a message “Verifying Update” and your device will restart.
  8. You’ll see the Apple logo with a progress bar.
  9. Once your device has restarted, then you should be able to follow the instructions provided in the video below.
  10. Whoever you send money to will also need to perform the above steps to get the money you send them.

Video

The Missing Announcement

An announcement on Apple’s website provides the missing information, but it should have been included at the introduction to the video or at the end.

20171207th0944-apple-pay-cash-ios-11_2

Conclusion

After some initial confusion and possibly frustration, hopefully users will figure out what they need to do to make Apple Pay Cash work.

The release of a major product feature, with incomplete information is disconcerting, particularly just weeks after a major security vulnerability and oversight in Apple’s macOS High Sierra that required an emergency update to 10.13.1. That bug allowed anybody to gain full administrative super-user control over any Apple computer from the login screen. Another less significant oversight recently was the inability to easily enter numbers into their program called Numbers.

Let’s hope that Apple does a better job going forward in fully testing everything they are pushing out to the public.

How to Cancel iPhone App Subscriptions

Some of the programs we use on our desktop or laptop computers have subscription services associated with them. An example is Evernote Premium.

Perhaps you signed up for premium service on your iPhone, and subsequently began using the product on your laptop or desktop computer. Now, almost a year later, you’re cutting back on some of the many unnecessary monthly and annual fees that can really add up to a lot. So, you’re wondering how to cancel a subscription.

You can follow these steps to review and cancel subscription services being paid through Apple iTunes. It’s a great way to discover hidden ongoing payments you may have long forgotten about. These instructions assume you have the latest iOS software update on your device and you’ve signed into your iCloud account on your iPhone or iPad.

  1. On your iPhone or iPad, go to Settings.
  2. At the top, tap on your name to access Apple ID, iCloud, iTunes & App Store.
  3. Tap on iTunes & App Store.
  4. Tap on your Apple ID displayed at the top of the screen.
  5. Choose View Apple ID from the pop-up list.
  6. Tap on Subscriptions (you may need to scroll down).

You will have now discovered a treasure trove of monthly and annual subscriptions you’ve been paying perhaps without knowing. Tap on any subscription for more information or to cancel.

Be careful to only cancel subscriptions you’re sure you don’t need. You don’t want to inadvertently cancel something and then later realize that you were using some feature or enhancement provided by the subscription.

iOS 11 iPhone Battery Drain from Weather App Location

The Problem

After upgrading to iOS 11 on the iPhone, you may notice the location information is being shared perpetually. This is evident because of a compass needle icon in the upper right corner of your screen as shown in the image above.

How to Fix It

This could be due to the Weather App having access to your weather even when it’s not visibly in use. If you have the Weather widget in your Notifications screen, the app could perpetually be checking your information. Instead, manually add your current location — and any future locations when you travel.

You should also check for other apps that may be continually using your location. Some apps, such as those that track your auto mileage, need to be tracking your location all the time to automatically know when you’re driving. So, reconsider whether or not there’s a better alternative such as MotionX-GPS track recording on demand.

Location Services

Go to Settings > Privacy > Location Services and review the list of programs. It’s best to have apps configured to use location services only when the app is in use, or never.

A few examples are below. At the bottom of the the applications list you’ll find a key explaining what the location services icons mean.

20170921th1239-location-information-IMG_6207

Evernote – Apple iTunes Login on iOS iPhone iPad

If you’re using Evernote on an iOS device like iPhone or iPad, you’ve probably noticed an annoying and persistent pop-up message asking you to login to your Apple iTunes account with your Apple ID password.

As of today, Evernote has finally acknowledged the problem with the following message on their Help page:

Evernote for iOS: If you’re prompted to sign in to iTunes, please tap Cancel to resume use of Evernote. We’re working on a fix. Thank you for your patience.

Last week, Evernote pushed out an update that caused their iOS software to be very slow and barely usable. There were error messages about the server not being available, and synchronization errors.

What’s troubling about these recent problems from such a well established and trusted company like Evernote is that they represent the ‘canary in a coal mine’ phenomenon of system failures, but here we have not a canary but an elephant in the coal mine. Big reputable companies are starting to show system strain and failure.

Across numerous industries, not just tech firms, we’re seeing poorly developed products that have little or no testing before being pushed out to the public. Any user will immediately notice bugs and wonder “Do they even use their own product?” These aren’t difficult to spot or identify problems.

At the risk of offering an oversimplified analysis, it seems that these kinds of problems usually occur when entire industries try to do more with less. Businesses seeking to become more ‘efficient’ go beyond the point of diminishing returns where the quality of products, services, and workplace satisfaction are degraded. Everyone loses.

We all need to do what we can to emphasize the pursuit of optimal quality rather than maximum efficiency. Quality products, quality workplaces, quality services, and the highest quality of life for everyone we work with.

Read iPhone App Update Notes Before Proceeding to Avoid Data Loss

When you update your iPhone apps you’ll notice under each app there’s an option to read “What’s New” to find out what has been introduced with this new update.

It’s good to read those notes for the following reason:

  • New Features. Sometimes it’s the only way you’ll learn of a useful new feature.
  • Critical Warning. Developers will sometimes put an important message in those notes such as “We’ve received feedback that this update will cause your phone to crash. We’ll get a revised one out soon.” That was a message recently with an app update.
  • Update Advice. There may be some advice from the app developer regarding the update. Some updates may require a backup of your data. See the example below.

It doesn’t take long to read the update notes, and most of the time it’s worth it because you’ll learn about some important new features and bug fixes.

For this reason, you may want to disable any automatic updates not just on your phone, but on your other devices and computers so you can be fully informed about the updates and make sure there are no known problems associated with the updates.

iPhone Updates – Screen Shots

Below you can see an example of how important update information isn’t visible until you tap “What’s New” to reveal it. In the example below, the app developer suggests users make a backup of their data before updating.

20161020th0927-iphone-update-notes-1024x768


Apple iPhone Buying Guide

A common question people have these days is with regard to which mobile device to purchase. I typically recommend the Apple iPhone using AT&T. I’ll briefly share about my choice of phone and carrier, then get down to choosing which iPhone is best. For Fall 2016 the choice is relatively easy.

Mobile Carrier

Verizon has good nation-wide coverage for making voice calls, but in my own testing for my area, I found the high speed data services have been about the same or better with AT&T. The ability to use wi-fi for phone calls on AT&T has made the effective coverage and usability inside of buildings and other areas much better. The Verizon pricing seemed much higher than AT&T for what you get, and their shared data plan (last I checked), had limits per device. So, even if you have 15 GB shared, no device could use more than 3 GB in a month (for example). The prices and offerings are always changing, but in general I’ve found AT&T to be the best out there.

On a side note, we had a weird customer service experience with Verizon where it took us months of emails and phone calls to get our service disconnected – long after we’d returned the Samsung phones to their store they were still billing us for wireless service. They said their records didn’t show that we’d returned the phones, even though we had receipts and paperwork to prove all this (and a sales person who confirmed it). We finally had to bring in the district manager to get it all straightened out. Even then, they kept promising it was taken care of, and weeks would go by and nothing was taken care of. Finally they stopped charging us for the service and we got the money refunded. Anyway, not the best experience.

Android or iOS

I tried Android for about a year and still have an Android device for testing. In general, I find the Apple hardware better and the Apple operating system more secure. The Android environment is very similar to a desktop computer operating system which has advantages (customizable with multiple brands of hardware to choose from) as well as disadvantages (viruses, and less standardization). So, overall, for people that just want to get their work done, I’d recommend the Apple iPhone.

Apple iPhone Models and Pricing

If you go to the iPhone page on Apple’s website you’ll see that as of Fall 2016, the iPhone 7 is the latest model available. The iPhone 6s and iPhone SE are also available.

The pricing of these phones is as follows:

  • iPhone SE with 4″ display is $450 (64GB)
  • iPhone 6S with 4.7″ display is $550 (32GB) or $650 (128GB)
  • iPhone 6S Plus with 5.5″ display is $650 (32GB) or $750 (128GB)
  • iPhone 7 with 4.7″ display is $650 (32GB) or $750 (128GB) or $850 (256GB)
  • iPhone 7 Plus with 5.5″ display is $770 (32GB) or $870 (128GB) or $970 (256GB)

Buying Considerations

Here are a few things to keep in mind:

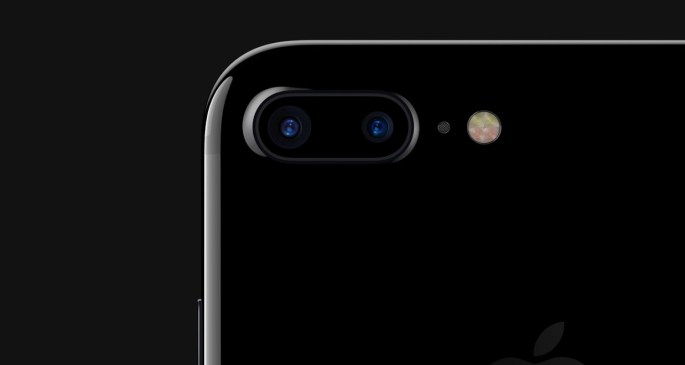
  • For a few hundred dollars difference, the iPhone 7 offers a faster processor, waterproof protection, and a much better camera. So, it’s a good choice for many people. It comes with an adapter to use older style headphones, and comes with newer style earbud headphones that plug in.
  • In previous years, the $100 price difference between the basic and plus models was simply to get a larger display. This year, the much better camera in the iPhone 7 Plus is something that is definitely worth it.
  • With regard to storage, 32GB is the bare minimum of what you’ll want. The next jump up is 128GB for about $100 more. That’s probably worth doing just to make sure you don’t run out of space.
  • There are lots of colors to choose from. Many people choose black and then add color with their choice of case.
  • The iPhone SE is attractively priced at $450 and it has a nice 4″ tiny size display which some people would like. Yet, the sharper metal edges, and smaller display could also be seen as a drawback. It depends on your preference.

Summary

The reason to choose the iPhone 7 Plus is to have a mobile device that is very fast and water resistant, with a large bright display and great camera.

The reason to choose the other models would be primarily to save some money – there are no other advantages. Their processors are now a year old, so their usable lifespan will be reduced. The few hundred dollars saved now is actually equated with a year or two less usability down the road. So, no savings in terms of long-term cost of ownership.

Video

In the video below, starting at the 54 minute mark, is a presentation about the iPhone  7.

Neat Receipts: Starting a New Year

Neat Receipts is a scanning hardware and software solution that integrates cloud services. Over a year or more, the scanning database can grow to over 1GB in size. This can eventually slow down your computer, and cause other problems.

So, it’s a good idea to consider keeping separate Neat Library files for each year. There can only be one default library file, but you can open other library files.

Below are instructions for creating a new Neat Library for a new year.

NOTE: These instructions only work with the older legacy Neat software. Their new cloud-dependent software is entirely different.

  1. Before starting the Neat software, copy the previous year’s library and put it in a folder for the new year giving the file a new name such as Neat Library 2016. It’s also good to have a backup copy of this file in case anything goes wrong, so you may want to put another copy elsewhere.
  2. Set the default library to the file created in step #1 above. Do this by going to the Neat menu, then Preferences. Under the General tab, you’ll find Default Library.
  3. Exit the Neat software.
  4. Start the Neat software.
  5. The recently created library file for the new current year should open as default automatically.
  6. Open the previous year’s file. It will try to synchronize (assuming you pay for the cloud storage). Stop it from synchronizing since you want to only synchronize the current year’s library file. To stop synchronization Double click on sync icon and turn off sync. Then close that file.
  7. Exit the Neat software.
  8. Start the Neat software.
  9. Now when you start Neat, the new year will open. If you open a previous year, it won’t synchronize.
  10. Remove any data from the previous year that still exists in the new year library file. Similarly, you can remove any data in the previous year’s library that belongs in the current year (if you had already started scanning in receipts for the new year while using the previous year’s library).