Tech Tip: Focus Without Distractions Using Driving Mode All Day Long

Here’s a great way to stay focused, distraction-free, and be productive all day when you have big projects that require creativity and concentration.

In addition to using Driving Mode while driving, you can use it anytime you want to focus and automatically notify people that you’re not available. This and some other suggestions below can help you stay focused.

These tips assume you are using an iPhone, but similar features should be available on phones with Android.

  1. GREETING. Set an outgoing message to let people know you’ll be unavailable, and perhaps indicate when you might get back to them.
  2. DRIVE MODE. Set your phone to Driving Mode and enable an automatic reply for text messages to let people know you’re unavailable.
    • CONTROL CENTER. On an iPhone you can go to Settings > Control Center > and add an icon for Do Not Disturb While Driving. Then you’ll have easy access to enable Drive Mode.
    • ACTIVATION MODE. Then, go to Settings > Do Not Disturb > to set the Activation to Manually. This allows you to turn on Driving mode any time.
    • AUTO REPLY. Then set the Auto-Reply text message, such as “I’m unable to respond at the moment. I’m either driving, in a meeting, or you’ve reached me after hours. I’ll try to get back to you as soon as possible. Thanks!”
    • ALLOW FROM. In the Do Not Disturb settings you’ll see an option to Allow Calls From certain callers so you won’t miss an emergency call. Or, for repeated calls from the same person within three minutes.
  3. MUTE. Mute sound effects on your phone. This will silence notifications and other distractions. The Drive Mode should already have enabled the Do Not Disturb mode.
  4. WATCH. On your smartwatch enable Do Not Disturb, Theater Mode, and Silent Mode. Place your smartwatch with the screen away from you to avoid distractions from on-screen notifications.

Special Considerations

While in Drive Mode your smartphone will usually prevent any interaction, since most cars provide an on-screen display for answering phone calls and using map navigation. The phone itself will not be usable, so if your work requires use of the phone these tips won’t work.

You could consider having a secondary phone, either on a phone plan or without a phone plan using WiFi only, to continue with iOS or Android tasks and not be interrupted by calls or text messages.

AutoSleep App Unable to Read Apple Watch Sensor – “No Watch Data Available”

The AutoSleep app runs on your iPhone and uses heart rate and other data from your Apple Watch  to automatically determine when you sleep and wake, and also evaluate the quality of your sleep. This document describes a problem that may arise and how to fix it.

No Watch Data Available

After using the app for a while, you may get a message that the app is unable to access the watch data. This could be a result of app updates or other factors. In the app, you’ll see “No Watch Data Available” at the top.

20181104su0718-autosleep-no-watch-data-available-sensor-IMG_3474


Wizard Reports 0% Sensor Information

If you go into Settings and run the setup Wizard, you’ll see the following message.

20181104su0718-autosleep-no-watch-data-available-sensor-IMG_3475

Problem Resolution

To fix this problem, try the following steps:

  1. Go into the the Apple Health app (white icon, red heart), select sources tab, select AutoSleep and then turn off all of the permission switches.
  2. Reboot the iPhone:
    • iPhone 6s and earlier: Press home + sleep wake button until you see .
    • iPhone 7 volume down button + sleep wake button until you see .
    • iPhone 8/X quick press up volume, let go, quick press down volume, let go, then press and hold sleep wake until you see .
  3. Reboot the Watch by pressing the crown and side button simultaneously until you see 
  4. Go back into the the Apple Health app select sources tab, select AutoSleep and then turn on all of the permission switches.
  5. Now go into AutoSleep app and this should restore all permissions.

This often completely fixes the problem.

Additional information on this issue and how to resolve it can be found on the Tantsissa website:

http://autosleep.tantsissa.com/wtdnosensordata

Apple iCloud iPhone iPad Photos Missing Not Synchronizing

In the past three days, I’ve had three different people experiencing problems with photos disappearing from their devices and missing from iCloud. I usually hear from my Apple customers once every 5 years when it’s time to upgrade to a new device. So, hearing from three in one week, all having the same problem, seemed unusual to me.

Problems Observed

Here is some of what’s being observed regarding the iCloud Photos synchronization issue:

  • People with multiple devices have noticed that photos recently taken on their iPhone won’t show up on their iPad.
  • Photos taken weeks ago on the iPhone will only have partially synchronized with other devices.
  • Mac computers synchronizing with iCloud may not show all photos.
  • The iCloud.com website may show all photos under the Photos folder, but photos will be missing under the All Photos folder.
  • On my own iPhone recently, I took a photo, saw it appear in the thumbnail preview as it was being saved, then looked in Photos but it was missing.
  • When going to the iCloud.com website, you may see a banner alert stating “Network unavailable or slow. Photos is taking longer than expected.” This can show up even if you have a tested network speed of 200 Mbps or higher. It’s presumably not an issue with local network speeds, but an problem with Apple’s network or servers.

Synchronization issues can be very challenging because a person may not notice if a few random photos go missing, particularly those from a few weeks ago.

User Interface

It’s important to know the difference between the “All Photos” display of photos and the “Moments” display. Because Moments and All Photos are organized differently, it’s possible at a glance to think some photos are missing. In Moments view, photos are listed by the date and time associated with them. In All Photos, pictures are listed in the order they were added.

On an iOS device, Moments are accessed by tapping the Photos icon. All Photos are found by tapping the Albums icon. These are found at the bottom of the screen on your iPhone or iPad while in the Photos app. By default, an option to “Summarize Photos” is turned on in Settings > Photos as shown below.

20180602sa2146-iphone-ipad-setings-photos-summarize-IMG_6544

All Photos. Under Albums, if you select All Photos, you will see all photos in your collection listed in the order they were added.

Photos > Moments.There are three levels of zoom in Moments view.

  • Year. When viewing Moments, the overview shows groups of photos by year with individual photos representing events or collections. These tiny thumbnails are about 1/8″ (.5cm) in size, and too small to see.
  • Collections. When you tap on an image in Year view, you will then see photos grouped by location and a range of dates with individual photos representing a group of similar photos (based on location, date, time, and image). So in this view you won’t see all your photos.
    • If you tap on a location title you can explore an automatically grouped collection of photos for the location(s) and dates selected. Note that the title text is white, so the title won’t show up for photos that are predominantly white or light colored. If you tap on the title, you’ll see a slideshow of that collection.
  • Moments. If you tap on a photo in the Collections view, you’ll be taken to the zoomed in view of Moments which is all photos listed in chronological order grouped by location, date, and time. If you scroll to the bottom, you’ll see a total count of photos and videos, as well as an indication of when the last update happened, or the progress of any current uploads or downloads.

Apple Support Experience

Working with someone this evening, I called Apple customer service (at 1-800-MYAPPLE) and was routed to what seemed to be an overseas call center. The support representative wanted the user information for the account with the corrupted photo collection. They said they wouldn’t have access to the user’s account, but they wanted the account information. The support person seemed uninformed about the nature of the problem, but said they could look into the account in more depth to try and fix the problem — contradicting what they’d said previously. Needless to say, no account information was provided to this support person.

Just to clarify, this was a call we placed to the correct Apple support number — not an incoming call from a fake support center.

System Failures

As a technology support consultant, I have an insight into wide spread epidemic problems. I’ll sometimes get a flood of support calls for similar issues and patterns of system failure become apparent. Or, I’ll write an article (like this one) about a technical problem and it will get thousands of page visits from around the world searching for an answer to a problem — which suggests many people are impacted by that problem.

Lack of Transparency

What’s frequently frustrating is that companies are very reluctant to inform customers of system failures and security breaches for fear of losing customer trust which could adversely impact the sacred ‘bottom line’ and shareholder earnings. So, there’s a lack of transparency. As a result, customers are left dangerously uninformed about massive looming data loss or privacy issues. Were customers to be informed about system failures, they could take the appropriate action to protect their data and personal information. This isn’t just a problem with Apple. It’s the nature of the self-preserving collective ‘narcissism’ found in corporate profit-driven culture. We’re all familiar with news of security breaches impacting millions of people who are only informed years later of the breach.

Actions

Here’s what I’d suggest for those experiencing the above issues or wanting to avoid them:

  • Archive Photos. In addition to using cloud synchronization, it’s a good idea to maintain a local archive of your photos. Windows users can copy photos directly from the camera. Apple users can import photos using the Image Capture program and save them to an archive folder on your computer or an external drive. You’ll want to have the optimization feature turned off (explained below).
    • In this scenario, you would use an archive location for all photos, saved by date and place or event name.
    • For editing and sharing photos, you can use your photo editing software of choice. If anything goes wrong, you can go back to the archive to get your untouched originals.
  • Backup. If you don’t already have your computer system backed up, consider setting up a local hard drive to backup your photos.
  • Check iCloud. Login to your iCloud.com account page and check to see if any missing photos are showing up in the main database. If you see photos in iCloud that aren’t showing up on your devices you might try the following:
    1. Use a friend’s computer to setup a local user account with your iCloud account.
    2. Start the Photos program and put the Photos Library on an external drive and synchronize with your iCloud photos with Optimization turned off.
    3. This process may take a long time if you have a large collection of photos in your iCloud storage.
  • Disable Optimization. When storage is limited, the photo optimization feature removes your pictures from your devices and puts the originals on Apple’s cloud servers. Thumbnail images remain. When in effect, when you click on an image, there may be a delay as the full resolution image or video downloads. If you have a slow internet connection this can take a long time. To disable the optimization feature, go to settings on your iOS device or Preferences in Photos on your computer.
    • A possible configuration would be to have a computer designated as your primary library with optimization turned off. If your mobile devices have optimization turned on, this can save space. In this way, the storage consuming photos can be on your computer’s drive or an external drive where your Photos library file can be maintained.
    • With optimization turned on, for all your devices, it means that you might not have any original photos anywhere, at least not  your entire collection. If your iCloud account gets hacked or corrupted, your photos will forever be lost.
  • Leave Computer On. If you leave your computer on, and the Photos program running (Apple users only), then the photos you take on your iPhone should appear on the computer, be stored, and also get backed up.
  • Traditional Camera. For important photos that you don’t want to possibly lose, consider using a traditional camera and manually copying all of your photos to two hard drives for redundancy.

Share Your Experiences

Please feel free to post a comment below about your own experiences with synchronization issues. Thanks!

Mediacom Approved DOCSIS 3 Cable Modems

Cable Modems

As of 11 Dec 2017, the following DOCSIS 3 cable modems have been approved for use with Mediacom internet service.

Downstream and Upstream Capacity

The above modems have 8×4, 16×4, and 24×8 ratings. This refers to the downstream and upstream channel capabilities. The chart below indicates speed capabilities for various systems.

Channels Down Channels Up Speed Down Speed Up
4 4 171.52 (152) Mbit/s 122.88 (108) Mbit/s
8 4 343.04 (304) Mbit/s 122.88 (108) Mbit/s
16 4 686.08 (608) Mbit/s 122.88 (108) Mbit/s
24 8 1029.12 (912) Mbit/s 245.76 (216) Mbit/s
32 8 1372.16 (1216) Mbit/s 245.76 (216) Mbit/s

How to Cancel iPhone App Subscriptions

Some of the programs we use on our desktop or laptop computers have subscription services associated with them. An example is Evernote Premium.

Perhaps you signed up for premium service on your iPhone, and subsequently began using the product on your laptop or desktop computer. Now, almost a year later, you’re cutting back on some of the many unnecessary monthly and annual fees that can really add up to a lot. So, you’re wondering how to cancel a subscription.

You can follow these steps to review and cancel subscription services being paid through Apple iTunes. It’s a great way to discover hidden ongoing payments you may have long forgotten about. These instructions assume you have the latest iOS software update on your device and you’ve signed into your iCloud account on your iPhone or iPad.

  1. On your iPhone or iPad, go to Settings.
  2. At the top, tap on your name to access Apple ID, iCloud, iTunes & App Store.
  3. Tap on iTunes & App Store.
  4. Tap on your Apple ID displayed at the top of the screen.
  5. Choose View Apple ID from the pop-up list.
  6. Tap on Subscriptions (you may need to scroll down).

You will have now discovered a treasure trove of monthly and annual subscriptions you’ve been paying perhaps without knowing. Tap on any subscription for more information or to cancel.

Be careful to only cancel subscriptions you’re sure you don’t need. You don’t want to inadvertently cancel something and then later realize that you were using some feature or enhancement provided by the subscription.

Q: My AirPods Aren’t Showing on My Apple Computer

If you use Apple’s new AirPod earbud headphones, you may have noticed that they will show up as available on your Apple iCloud connected devices, including your Apple computer. You’ll see them as an available audio output device under the volume control.

However, sometimes the AirPods won’t show up in the dropdown menu under the volume control.

In such cases you’ll need to click on the Bluetooth dropdown menu. If the Bluetooth menu isn’t showing, go to System Preferences > Bluetooth and check the box that says “Show Bluetooth in menu bar.”

From the Bluetooth menu bar there’s an option to Connect to the AirPods.

Also, in System Preferences > Bluetooth, you’ll notice the ability to configure options for the AirPods such as selecting what tapping on the AirPods will do (activate Siri or play/pause audio). You can also set how the beam forming microphones will work (left, right, or automatic). Automatic Ear Detection can also be turned on or off. This is the feature where the AirPods automatically sense when they have been put in your ear and they can start or resume playing music automatically.

The Apple Watch and other Activity Trackers

20 Years Without a Watch

Until recently, it had been about 20 years since I’d worn a watch. Back in the 1990s, my classic Casio analog watch cost under $20 and served me well for many years. In part, my desire to stop wearing a watch was a result of not wanting to be so focused on time, and it was one less object of distraction in my field of vision.

In October of 2016, I purchased an Apple Watch which arrived in November of 2016. Recently I had someone ask my opinion of the Apple Watch. Having used it for a few months, would I go back and do it again? In other words, is it a product that seems worthwhile owning. My response was not the typical enthusiastic fanboy reply that I’ve had with some products I own: “Yes! I love it! It’s the most amazing thing I’ve ever owned!” Instead, I had to think a bit. Was it worth it?

What would I advise others about this almost embarrassingly expensive watch? The reply I’ve had from some people when I ask them about their Apple Watch has been “Oh, this? I didn’t buy it. It was a gift.” One person I talked to won theirs at a conference. These people wanted me to know that they would never have made such a frivolous ridiculously extravagant unnecessary purchase. Once over that hurdle, we’re able to talk about the watch. Usually people are proud to show off expensive clothing, handbags, or sports cars, but with the Apple Watch, for some people it seems almost embarrassingly excessive.

In the past, I’d been an early adopter of technologies, buying new technology the moment it becomes available, or even decades before it’s commonly available or used. That’s expensive. My first computer-attached CD drive was a big box that cost $1,200. Today they are $20. My first scanner was $1,200. Today they cost $40. We pay a premium when buying technology early. It may give you a competitive edge in business. Maybe not. Maybe it never catches on. Some buy technology early, without any concern about its longevity, because their purchase is to show others that they are a risk taker or so extravagantly wealthy they need not care about price.

Sometimes early adopters are viewed as ‘chumps’ who pay way too much for products just so they can impress their friends and gain attention by being the “first on their block” with some new technology. This presumably conveys to others that they are wealthy and have “money to burn” on something that has up until recently been so unnecessary as to be nonresistant. For some consumers this may be true. For many people, it’s good advice to avoid new technologies that tend to be expensive, buggy, and possibly short-lived.

As someone in the industry, I like to know about new emerging technologies, and I also like to feel I’m giving back financially to the industry I’m working in. It’s a way of joining with other consumers to tell manufacturers that we collectively want this new product to succeed. It’s what we refer to today as a kick-starter. When I first learned of CD drive technology for computers, I thought, “Hey, this CD drive seems like it might become a big deal.” So, in support of the concept, I bought one, and actually found it quite useful. I suppose the same was true for early adopters of automobiles — those people probably seemed foolish to purchase something that to that point was so unnecessary that it hadn’t even existed before.

It’s been about two years since the Apple Watch came out, and now other similar products are on the market. So, my purchase comes a little late in the product cycle. This article shares what I believe are some of its benefits and drawbacks. I offer this as advice to those thinking about purchasing a fitness activity tracker or wellness wearable device.

FitBit One (July 2013)

A few years ago, when I became interested in purchasing an activity tracker I wanted one that could clip on or fit in my pocket. In July of 2013, I decided on the FitBit One ($80 from Amazon). It has worked well for many years to track my daily activity (steps and stairs climbed) as well as my sleep time and quality. I find that the FitBit website and app provide an excellent comprehensive wellness hub for not just activity, but everything relating to a person’s overall health (exercise, sleep quantity/quality, food consumption, weight, water consumption, etc.).

Yesterday, watching “The Zoo” on Animal Planet, I was surprised to see the FitBit One being used at the Bronx Zoo for tracking activity and behavior of Fennec Foxes. Each fox actually had their own FitBit wellness dashboard where their steps were displayed. Very cool. The FitBit One was an ideal device to use because it’s small, light, very rugged, waterproof, and can be fitted into a collar.

Original Apple Watch (April 2015)

The Apple Watch was first released in April 2015. To me it seemed expensive, a bit bulky, short on battery life, and its functions were limited. I didn’t want to go back to wearing something on my wrist. The FitBit was providing me with activity tracking. My iPhone had all the features I’d ever need. I wasn’t so lazy that I couldn’t reach in my pocket and use my iPhone for anything that the Apple Watch would offer on my wrist, and with the iPhone I would have a much larger screen. At a cost of $350 to $17,000, it seemed to me that the Apple Watch was an expensive unnecessary extravagance that would quickly depreciate and soon be discontinued.

The Downfall of FitBit (August 2016)

By 2016, it seemed to me that the FitBit ecosystem was beginning to crumble. Here are a few core reasons why I became less enthusiastic about the FitBit system:

  1. Data. FitBit advertises that they believe a person’s personal health data is their own, and should be downloadable. Presumably some companies don’t offer an easy way to get information downloaded from their cloud services. So, FitBit was distinguishing themselves as data download friendly. In reality, their data download feature is quite limited, allowing for downloads only one month at a time. These downloads creates spreadsheets that are workbooks with multiple pages. So, there’s no way to click a button and download several years of data, and there’s no way to easily get all of your data in one place for longitudinal analysis. If you weigh in several times a day to check variations, you’ll be frustrated to see that the downloaded data only includes one weight measurement per day and no time is included.
  2. Food. The FitBit food database seems to increasingly have common foods that are not listed. In some cases, it seems that certain restaurant foods are listed, but some are missing. Other entries seem incorrect. When you look on the label and check what’s in the FitBit database, the information is sometimes wrong or incomplete. I eventually started manually entering my foods to make sure the values were correct.
  3. Sleep. FitBit had developed one of the best sleep analysis reporting systems available. Then they broke it. Here are a few of the things that no longer work properly.
    1. Ambiguous Tracking. In the past, the FitBit software would show when you were in deep sleep, light sleep, and awake during the night with the exact time displayed so you could look into what might be disrupting sleep. At some point in 2016 the software was ‘upgraded’ and the ability to see these details was gone.
    2. Bad Synchronization Issues. In the past, when you’d wake up in the morning and tap the “I’m Awake” button, you would immediately see your sleep chart. With their latest ‘improved’ version, it takes a long time for the chart to show up. It’s as if the FitBit One device is not synchronizing periodically throughout the night even though that setting is on. So, one must wait sometimes several minutes for it to work.
    3. Duplicate Synchronization. Sometimes an error message will appear on screen saying there is already a sleep entry for the current day. It’s as if the synchronization with the cloud results in some duplication.
    4. Problems Adjusting Sleep Range. When you go to make slight corrections in the sleep range, the chart immediately shows the adjustment, but then, before your eyes, it will adjust itself back to what it had been. So you change it again. This can happen a few times. It’s as if the cloud data has priority over the changes you’re making and so the cloud wins out unless you go slowly. Because the detailed time is no longer showing in the graph, it’s not possible to quickly tap on the graph to see when you went to sleep. In other words, if you’re entering your sleep time the following morning, and didn’t start the sleep timer the night before, or the sleep timer crashed, when you go to adjust that time, it’s guess work because you see red lines and blue lines but no indication of the actual time. So, each time you guess a time, and enter it, the chart adjusts and then goes back to what it had been. It’s a bit frustrating.
  4. Weight. The Fitbit Aria WiFi Smart Scale was one of my favorite FitBit products. Every day I would weigh in, and moments later my weight and percent body fat would show up. There would be a delay, sometimes of several days, between the time I’d weigh in and when the weight would show up in my FitBit app or online. I began manually recording my weight every day, which defeats the purpose of having it automatically recorded. Eventually I went back to using my old Tanita Ironman InnerScan Body Composition Monitor which game me a much more comprehensive body composition analysis.

I’ve reported the above to FitBit and was told they will take these things under advisement. Since then, multiple firmware updates have been released and numerous app updates have been released. The company doesn’t seem to be interested in fixing the above issues. Becoming less enthusiastic with the FitBit caused me to look at what the Apple Watch might be able to do.

The Improved Apple Watch (September 2016)

In September of 2016, Apple announced the Apple Watch Series 1 and Series 2 models with some significant improvements over the original model. The Series 1 is the same as the original Apple Watch, but with improved internal computing power and lower price of $269. The Series 2 offers a faster processor, built-in GPS, water resistant enclosure, a brighter display, and other benefits. For $100 more than the Series 1, the Series 2 at $369 seems to be a better value.

Deciding to Purchase the Apple Watch

The improvements offered with the Apple Watch Series 2 were part of what motivated me to consider purchasing the Apple Watch. Here are some additional thoughts and considerations that motivated me to purchase the Apple Watch.

  • Brightness. One of my concerns about the original Apple Watch was that the screen seemed a bit dim. The Series 2 has a brighter screen.
  • Consumer Interest. When I purchase a product or service, I feel that in some way I’m offering my ‘vote of support’ for seeing that product continue to be developed and available in the future. In the past, I’ve purchased and used products while they were in their infancy, and so excessively costly that purchasing them was almost an act of absurdity. In the 1980s, while in college, I sat in lectures halls using a laptop computer (TANDY Model 100) about 15 years before laptop computers became widely available and economical. In the 1990s, when the Apple Newton became available, I paid about $800 for what was essentially the first iPad, about 20 years before the technology was widely adopted. As mentioned previously, my first scanner was $1,200 and my first CD ROM drive was also $1,200. These all became tools I used and relied on, but the act of being an early adopter to me was, in part, a way to support the industry and products. The Apple Watch is a product I want to be supportive of, even if in its current version it’s still a bit expensive, Early adopters help make it possible to have continued development of products so in the future they can be better and less expensive.
  • Cost. At a cost of $269 for the base model, the Apple Watch Series 1 is priced similarly to other fitness tracker smart watches and wellness wearables. TomTom offers more advanced smart watches for up to $350. Garmin has smart watches for up to $450. FitBit has activity trackers for up to $200. Polar has smart watches for as much as $372. So, at $369 for the Apple Watch Series 2, it’s not the most expensive smartwatch available.
  • Future of Wellness Wearables. There are some wearable wellness technologies on the horizon that I think will make wearable devices commonplace. The next generation of wellness wearables such as AIRO and the Healbe GoBe promise to provide realtime blood analysis to determine our actual caloric intake. The FDA has approved wearable pancreas technologies that may eliminate Diabetes. I’d like to embrace the idea of using wellness wearables, and the Apple Watch seems like a good place to start.
  • Improved Activity Tracking. I like the idea of more accurately tracking my other activities besides just tracking my steps during the day. The Apple Watch can track calories burned during bike riding, weight lifting, as well as exercise on elliptical and other fitness equipment. I like the idea of having a single consolidated data collection system for all my activities.
  • Informed Support Provider. As a tech support person, I find that immersion is the best way to learn a new technology. I want to know how to purchase, setup, use, diagnose, and fix the technologies that I support. In addition to that, I enjoy looking for creative ways to use technology that I can only discover once using it. So, even if I’m doing very little in the way of helping people purchase, setup, use, or fix these new all-in-one solid-state modular mobile technologies, I think what I can offer of value are insights into creative ways to use them.
  • Product Demand. Seeing the market expand with a wide array of similarly priced watches seems to indicate that wearables are not going to be a passing fad. I’ve seen more and more people using some kind of wellness wearable. So, I’m not concerned about potentially investing in a technology that won’t be around in a year or two.
  • Pulse Monitoring. Something my pocket FitBit doesn’t provide is pulse monitoring, and this got me thinking that smart phones can do just about anything, but they don’t offer realtime pulse monitoring while exercising. For that we need wearables.
  • Speed. One of my concerns about the original Apple Watch was that it seemed a bit slow to open apps and perform functions. The Series 2 has a faster processor which should work with future upgrades at least for a couple years.
  • Waterproof. A drawback to the original Apple Watch is that it can be easily damaged by water. I’m reluctant to purchase a product at any price that’s potentially damaged by exposure to a little bit of water. The new Apple Watch Series 2 is water resistant to 50 meters. That’s important to me. Whatever product I would be wearing, I want to be able to wear it in the rain on my bike, sweating at the gym, or while doing dishes.

Which Apple Watch Model to Purchase

With their various products, Apple typically offers some very persuasive reasons for spending a little more on an upgraded product. For example, a bigger screen on the iPhone is just $100 more. Getting 4-times as much memory (up from 32 to 128GB storage) is $100 more. Getting the newest model with improved features and camera rather than last year’s model is just $100 more (Apple offers the previous year product at a $100 discount off the current year). It seems foolish to spend so much money on a phone and not spend a few hundred dollars more to make it an amazingly fast, big, super-duper phone. Their laptop computers, desktop computers, iPad devices, and the Apple Watch have similar pricing that makes you want to get the nicer models for “just a little more money.”

When you visit the Apple Watch purchase and configuration page, you’ll see a list of models, features, and options to choose from:

  • Series – 1 or 2. The Apple Watch Series 1 costs $269. As mentioned above, for another $100 the Series 2 offers a long list of additional benefits such as a faster processor, built-in GPS, water resistant enclosure, a brighter display, and more. So, the Series 2 seems to be the best value.
  • Case Size – 38mm or 42mm. At a cost of about $30 more, it makes sense to have a larger display. For the Series 2, this brings the price to $400.
  • Case Material – Aluminum, Stainless Steel, or Ceramic. The case material is fairly important since the watch is something that will likely be bumped into objects. Aluminum and the accompanying watch crystal are more susceptible to scratches and damaged. Stainless Steel provides a much more durable case and crystal option. At a cost of $200 more, it makes sense to have such a costly product protected from damage. This brings the cost to $600. The Ceramic case version costs about $1,300 which makes it impractical for most people, although Ceramic is reportedly much stronger than Stainless Steel.
  • Watch Band. There are a variety of watch band options with the Apple Watch. The Sport band is a comfortable, durable, stain resistant band which happens to be the least expensive option.
  • Apple Care. For a cost of $49, it’s possible to get a two-year warranty rather than a one-year warranty. This also provides “up to two incidents of accidental damage coverage, each subject to a $69 service fee, plus applicable tax. In addition, you’ll get 24/7 priority access to Apple experts via chat or phone.”

So, an Apple Watch, Series 2, 42 mm, Stainless Steel Case, with the Apple Care extended service costs about $650 and seems to be a good choice. You can see how it’s fairly easy to reach a price that’s twice the cost of the basic model. Anyone wanting to save a few hundred dollars on the Apple watch could consider purchasing the basic model for $269. Those with less concern about cost, and desiring the latest style can spend $1,300 or more.

Most Used Apple Watch Features

Having used the Apple Watch over the past 5 months, here are some of the functions I find useful.

  • Driving. I’ve had a variety of GPS systems that work fairly well, but most distract me from my driving as I look to the map to double-check for my position and approaching turns. With the Apple Watch, I like having the vibration and sounds that alert me to upcoming turns without having to look away from the road to an on-screen map.
  • Messages. While riding my bike, if I receive an email, phone call, or text message, it’s nice to be alerted on my watch.
  • Payments. It’s handy at stores to use the Apple Watch for payment during checkout at the register. So, when going into stores that accept Apple Pay, I don’t need to carry my bag.
  • Pulse. In the past, I found it very convenient and accurate to use my $10 classic Casio analog watch to check my pulse. However, I do find it’s nice to have realtime ongoing monitoring of my pulse. I like being able to see my pulse at a glance while riding my bike or exercising — not having to interrupt my workout. At night, my pulse is monitored to provide enhanced sleep quality data.
  • Relaxation. A person doesn’t need a fancy watch to remind them to relax. Even so, it is nice to have the watch remind me to stand if I’ve been sitting for too long, and to do focused breathing periodically throughout the day.
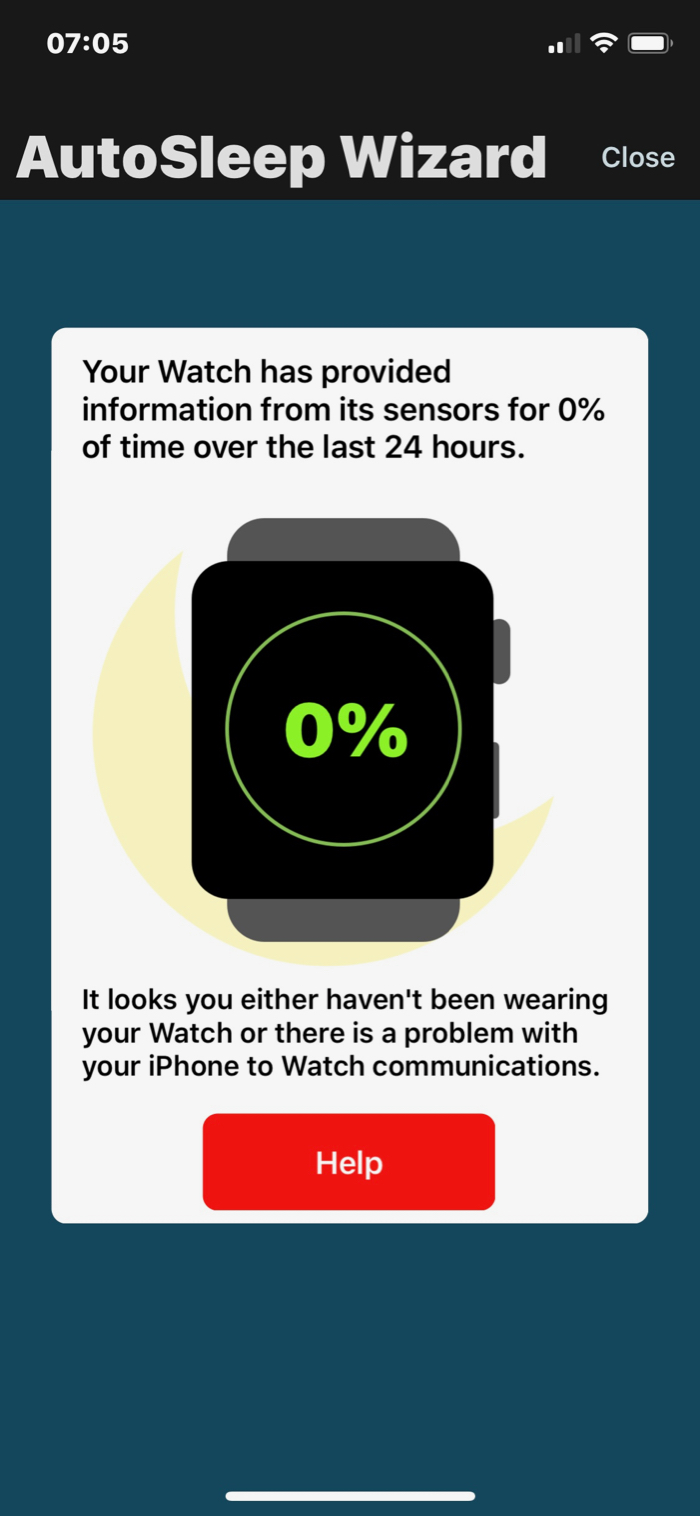
  • Sleep. With the AutoSleep app ($2.99) it’s possible to use the Apple Watch for very advanced sleep tracking.
  • Time. In the past, I’ve not wanted the time to be so visible throughout the day. However, these days I’m finding it nice to be able to look at my wrist and see the time. If I decide I don’t want to be reminded of the time, it’s easy enough to display only the weather or my activity progress for the day. In the same way the Apple iPhone is often used for everything but phone calls, the Apple Watch is becoming a device that will be used for many tasks other than checking the time.
  • Weather. I’ve configured my watch to show (among other things) the temperature, daily predicted high/low temperature, and precipitation (if any). So, just lifting the watch, in one place as I’m going out the door, I know what outerwear I should grab for my walk, bike ride or other activity.
  • Workout. When walking, riding my bike, working out on the elliptical machine, or lifting weights, I like using the Apple Watch to track my workouts. The watch uses my pulse to calculate my level of exertion and calories burned. For outdoor activities, I can review a map of my route with variations in speed represented by red (slow), yellow (moderate), or green (fast). All of my activity during the day, week, and month can be charted.

Third-Party Programs

The above functions mostly make use of the built-in functions without additional third party software. For decades, whether using Windows or Apple computers, I’ve made a choice to do as much as I can with the included software. I find computers (or watches) tend to work faster, more reliably, and have a longer battery life. When necessary I’ll use a third party program or app, but I try not to overdo it. I consider how necessary it is, and whether or not I could do something similar with built-in features. I know there are other people who fill their computers, iPads, iPhones, and Apple Watches with hundreds of games, utilities, and programs many of which no longer get used. I try to avoid that other unnecessary clutter. With the Apple Watch, I don’t want too many distractions and pop-ups during the day. I can configure the watch to alert me to just what’s essential.

Concluding Thoughts

With regard to activity trackers, smart watches, and wellness wearables, there’s clearly no single obvious best choice for everyone. Each person will have their own needs, budget, and sensibility about what works best for them. I hope the above observations help those trying to decide what to do with their own wearable technology purchase.

TheTileApp.com – How to Replace or Remove a Tile

If you’re a new user of the Tile property locator system, you’ll find getting setup is very easy.

In about a year, you will be notified that your tiles will soon stop working. This is because each tile is apparently good for a 1-year subscription only, then it must be replaced.

Let’s say you start with the Four-Tile kit, then a year later decide that you really only need one Tile. At that point, you’ll need to replace one Tile, but delete the other three used Tiles. This is where things get a little tricky.

Deleting Tiles

It’s not possible for you to delete Tiles without the help of customer service. You’ll need to contact customer care between 8:30 am and 5:30 pm Pacific Time. During that time, a chat option will be available and appear in the lower right corner of the Contact Customer Care page.

During your text chat session with Customer Care, you’ll need to provide the following:

  1. The email address you used to setup your Tile App account.
  2. The name(s) of any Tiles you want removed.
  3. The Tile Identifier numbers for the Tile(s) you want removed.
    • You can get the Tile Identifier numbers by tapping on the specific Tile name in the Tile App, then tapping Options, then tapping Details. The Tile Identifier number will appear on the Details screen.

Note: When communicating with Customer Service about deleting your old Tiles, the representative may act like you’re asking them to do something very unusual and exclaim: “Are you really sure you want to delete your old Tiles? This is permanent and they can never be used again.” This seems odd since the Tile App is saying the Tiles are about to exceed their usable lifespan. Even so, you need to persist and have the old worn out tiles removed.

Replacing Tiles

An odd thing may happen when you replace an old Tile. If you follow the instructions provided with the new Tile, you’ll do the following:

  1. Open Tile App.
  2. Tap on the name of the Tile you plan to replace.
  3. Tap on Options.
  4. Tap on Details.
  5. On the Details screen, tap Replace Tile.
  6. You’ll see a message stating: “You are about to add a new Tile to replace the current Tile. We will copy the name and photo to your new Tile. Your current Tile will become unusable.”
  7. Continue through the guided instructions.
  8. When you are done, the new tile will appear in use and the old tile will no longer be on the list

The instructions that come with the new Tile will state that the old Tile will become unusable after being replaced. However, here’s the possible odd thing that might happen… You might be able to add the old Tile to the Tile App again and continue using it. However, it’s not clear how long a tile can be in use before the battery actually stops working. When a Customer Service representative checks your account, the old Tile will appear to be a Tile that had never been activated before. They will insist that the old Tile that you’ve reactivated has never been used before.


Neat Receipts: Starting a New Year

Neat Receipts is a scanning hardware and software solution that integrates cloud services. Over a year or more, the scanning database can grow to over 1GB in size. This can eventually slow down your computer, and cause other problems.

So, it’s a good idea to consider keeping separate Neat Library files for each year. There can only be one default library file, but you can open other library files.

Below are instructions for creating a new Neat Library for a new year.

NOTE: These instructions only work with the older legacy Neat software. Their new cloud-dependent software is entirely different.

  1. Before starting the Neat software, copy the previous year’s library and put it in a folder for the new year giving the file a new name such as Neat Library 2016. It’s also good to have a backup copy of this file in case anything goes wrong, so you may want to put another copy elsewhere.
  2. Set the default library to the file created in step #1 above. Do this by going to the Neat menu, then Preferences. Under the General tab, you’ll find Default Library.
  3. Exit the Neat software.
  4. Start the Neat software.
  5. The recently created library file for the new current year should open as default automatically.
  6. Open the previous year’s file. It will try to synchronize (assuming you pay for the cloud storage). Stop it from synchronizing since you want to only synchronize the current year’s library file. To stop synchronization Double click on sync icon and turn off sync. Then close that file.
  7. Exit the Neat software.
  8. Start the Neat software.
  9. Now when you start Neat, the new year will open. If you open a previous year, it won’t synchronize.
  10. Remove any data from the previous year that still exists in the new year library file. Similarly, you can remove any data in the previous year’s library that belongs in the current year (if you had already started scanning in receipts for the new year while using the previous year’s library).


Square: Here’s Why You Need a Credit / Debit Card Reader (Videos)

Having the ability to receive credit card payments is very helpful — not just for those running a small business, but for anyone wanting to receive a payment from someone. These days people are less likely to carry cash or a checkbook. Cards and smartphones are becoming a more common currency tool.

Merchants sometimes issue refunds, rebates, or rewards on prepaid non-reloadable debit/credit cards. If you’d rather cash out the money, you can use a credit card processing device to get the money into your bank account.

There are several providers of credit/debit card processing readers: PayPalSquareUp, and Intuit (the QuickBooks people).

Square Card Readers

SquareUp (Square) is one of the most popular services and offers a very elegant retail ‘cash register’  with card reader that holds an iPad. There is also a bluetooth reader available for Apple Pay and cards with chips.

Learn More

20160131su-square-squareup-credit-card-processing

SquareUp Videos

The Barbershop Club


Register Overview


Accepting Chip Card Payments with the Square Contactless and Chip Reader


Getting Started with the Square Contactless and Chip Reader


Everything you need to know about EMV (Chip Cards)