Ubuntu Linux: Create an ISO Image from CD or DVD

Instructions

Follow these instructions to create an ISO image from a CD or DVD.

  1. Insert CD or DVD.
  2. Run Terminal.
  3. Run the following command:
    cat /dev/sr0 > cd_ISO_output_name.iso
  4. Another command that may work is:
    dd if=/dev/cdrom of=~/cdrom_image.iso

In Ubuntu, you can use the Disks utility to find your drive ID name. In the example above, it is sr0.

The resulting ISO image should show up in your home folder, but you can choose any destination you’d like by placing the path before the file name, such as /home/Desktop.

To test the ISO image, double click on it and view its contents.

Disruptive Trends on the Technology Landscape

Disruption in Technologies and Services

It’s difficult these days to get any kind of assurance for the longevity of the hardware, software, and services we rely on.  Companies announce new products and services with great fanfare. Consumers buy in, and over years, begin to heavily rely on those new products and the processes we develop for them. They impact our relationships and work life. Then one day, those services or products are discontinued or dramatically changed. This pattern is disruptive to our personal life and work life. What’s sad is that these business decisions aren’t made based on what’s best for society or individuals, they are based on profits. A great product that’s helping people and society will be discontinued if something more profitable comes along (even if it’s not so helpful to society).

Apple’s Track Record

On November 5, 2010, after over 8 years of sales and promotion, Apple abruptly announced that their Xserve line of servers would be discontinued on January 31, 2011.

20140921su-apple-xserve-server-1u-discontinued-sorry

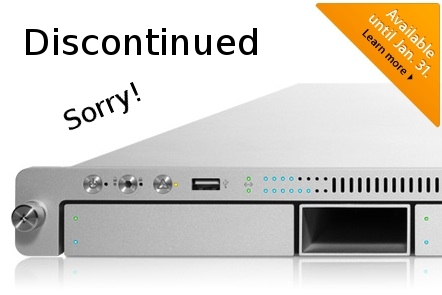
Providing less than a 3-month notice for this change was a shock to those in the industry who generally plan 4 and 5 years in advance. Server farms built on the Apple infrastructure were now at a standstill with regard to hardware continuity. Often facilities are setup and new equipment is phased in over several years rather than all at once. So, this left large installations only partially setup with hardware that would no longer be available. Nobody wants to have a room full of servers that are different platforms.

Another wonderful enterprise-class solution that Apple pulled the plug on was their Final Cut Pro and Final Cut Server video production solution. Again, as with their rack mounted servers, this was another example of a sudden change that would have a huge adverse and disruptive impact on many professionals.

An additional blow to professionals and high-end computer users was the choice to discontinue the Apple Mac Pro computers that provided high-end graphics card options and up to four internal hard drives that could be set to RAID configuration and upgraded easily.

Websites are another complex long-range endeavor. Those who trusted Apple and jumped on the iWeb bandwagon were unpleasantly surprised to learn that Apple would no longer be updating or supporting iWeb.

Another ongoing problem with Apple is the introduction of standards for cables and adapters. Whether power cords, video cables, or hard drive interfaces like Firewire, Apple is constantly changing their mind on what standard to use. New ‘innovations’ result in tons of non-recyclable toxic consumer waste being released into the environment.

True to Apple’s demonstrated corporate practices, there is usually little or no advance notice before these abrupt changes take place. This has caused many people to switch away from Apple and move toward more ubiquitous hardware and software choices (like Linux running on whatever piece of hardware happens to be available).

Yet, Apple isn’t the only company that rolls out long-term innovative solutions, that slowly gain thousands of followers, just before the projects are terminated.

On September 2, 2011, Google announced that they would be discontinuing numerous products. This announcement included blatantly misguided and incorrect statements designed to appease consumers:

  • Google Desktop was a very useful tool for people wanting to search their computer for files. Google discontinued this amazing tool claiming that “In the last few years, there’s been a huge shift from local to cloud-based storage and computing.” Years later, people are still buying computers with massive internal storage, they are still storing files on those computers, they are still buying external hard drives for storing their files. Cloud storage simply is not a replacement for local storage. Google may have wished that this might nudge consumers into using their Google Drive product, but despite such services being readily available, they don’t work for everyone in every situation. Even as a staging area, we need local storage to quickly organize huge collections of files.
  • Google Pack was discontinued and Google provided this explanation, “Due to the rapidly decreasing demand for downloadable software in favor of web apps, we will discontinue Google Pack today.” What Google wishes to be true isn’t necessarily true. One need look no further than the Apple App Store. By 2013 there had been 50 Billion software downloads. Google wishes the entire world would have a high speed internet connection and use their web dependent browser apps, yet wishing it to be doesn’t make it so.

By March of 2013, Google made another surprise announcement and brought the number of discontinued services to 70.

When Google discontinued their Google Video service in favor of YouTube, this left thousands of consumers with videos in their cloud and very likely no local copy of those videos from years ago. They had the option to download them before they would be deleted, but for people with many videos stored, this was a huge undertaking. No option was offered to migrate those videos seamlessly to YouTube.

Another example of “wishing it to be true doesn’t make it so” (like Google’s examples above) was Apple’s declaration that they days of the DVD drive are over. Apple discontinued having DVD drives in their desktop and later laptop computers. They imagined that everyone would buy videos from their iTunes store. Yet, consumers have purchased millions of Blueray discs because of the sense of ownership and due to the fact that downloading and storing such high resolution movies would be problematic.

When explaining why their laptop and desktop computers don’t have touch screens, the statement from Apple was that consumers won’t want to reach up and touch a screen. In reality, Apple was ensuring that consumers wouldn’t find all the features they were looking for in an individual product. For example, a MacBook air with touch screen would impact their iPad sales. An iPhone with a larger screen might impact sales of the iPad Mini.

In their iMac computers, Apple introduced an amazingly popular feature — the remote control. Now consumers could watch videos on their computer as an alternative to a television. Ooops! Apple realized that to pull consumers away from their computers, and get them to purchase an Apple TV device, they’d need to discontinue the remote control for their iMac computers, and that’s what they did.

Best Practices in Disruptive Environments

The point of this article is not to bash on Apple or Google, but instead to raise awareness about the state of technology and services we rely on. Consumers and businesses should always have an ongoing plan for how to mange computing and data storage.

Use Standard Programs

One approach to consider is the following. Let’s say you have found an amazing program that let’s you enter your home inventory, or track your weight lifting, or keep track of some other kind of information. If you use a specialized program, your data may end up in a system that won’t let you easily migrate to another when that system is no longer around. If instead you use a spreadsheet, you can later transfer the information to another spreadsheet program if the one you’re using is no longer available.

In other words, look for the simplest effective solutions to your technology needs. This will reduce your risk of disruption from industry changes and abrupt business decisions.

Choose Long-Term Support

With an operating system like Ubuntu, for example, you get 5-years of long term support guaranteed. The operating system can run on just about any hardware (new and old). So, your’e not dependent upon a certain hardware vendor (like Apple) when you need to find a replacement.

Similarly, if you grow dependent upon a mobile phone operating system like Android,  you can choose from a wide variety of vendors and phones, rather than being locked into a specific hardware vendor who, knowing you’re dependent upon their ecosystem, can charge you top-dollar for what might not be the best product on the market.

Dell offers the Latitude series of laptop computers with a guarantee of long-term support for parts. They also make an effort to have parts such as batteries and CD/DVD drives be interchangeable from one model year to the next. This is helpful for larger enterprises as well as small businesses and individuals.

Remove Complexity

If you find that you’re increasingly dependent upon complicated systems and software, consider simplifying your life or business rather than letting things grow more complicated and dependent upon expensive proprietary solutions.

These are a few suggestions for better navigating the changing technology landscape.

Linux Computer Setup and Software

Summary

The standard Ubuntu Linux installation includes most of the software that people typically need for browsing the web and creating documents. However, some additional programs may be helpful depending on what kind of work you do. This document lists those programs and includes some other details about setting up a Linux computer. New programs will be added to this list as they are discovered.

Initial Setup

Unless you’ve purchased a computer than includes Linux, you’ll need another working computer to download the operating system and create a bootable installation DVD or USB flash drive. The best choice is a USB flash drive. Visit the Ubuntu download page to select the right version (flavor) for you and follow the instructions for making a bootable USB for Windows,  Apple, or Ubuntu.

Startup your computer and choose to boot to the USB device. On Dell computers this is typically done by pressing the F12 key on startup. MSI Motherboards use the F11 key for the boot menu.

Install Software

The following software is useful to have installed on a Linux computer for greater productivity.

  • Agenti – This helps manage sharing and other server features on your Linux computer. You’ll need to install Samba (see below) and restart the computer before Samba will show up in Agenti under the Software heading.
  • FileZilla – This is an FTP client useful for people who work on websites. Using the Ubuntu Software Center is the best way to install FileZilla.
  • Gimp Image Editor – This software lets  you edit images. This software is available for download in the Ubuntu Software Center. You can also use Terminal and install with these commands:
    • sudo add-apt-repository ppa:otto-kesselgulasch/gimp
    • sudo apt-get update && sudo apt-get install gimp
  • Google Chrome – This is an excellent browser option for multiple platforms because it permits the installation of additional programs. This software is available for download in the Ubuntu Software Center. You can also download it from the Chrome Download page. There are many popular Google Chrome store apps. Here are some Google Chrome based programs that you’ll probably want:
    • Edge (Ruler) – Lets you measure objects on your screen in pixels, inches, or centimeters.
    • Gmail Offline – Lets you read and draft emails even when you’re not connected to the Internet.
    • Google Docs – Microsoft Word equivalent for word processing.
    • Google Forms – Lets you create online forms, polls, and surveys.
    • Google Keep – Cloud synchronized notes available on all your devices.
    • Google Music Player – Lets you store your entire music collection in the cloud and play from all your computers and devices.
    • Google Sheets – Microsoft Excel equivalent for spreadsheets.
    • Google Slides – Microsoft PowerPoint equivalent for presentations.
  • GParted – Lets you partition, format, and otherwise manage hard drives. This software is available for download in the Ubuntu Software Center. You can also use Terminal and install with this command:
    • sudo apt-get install gparted
  • Handbrake – Lets you create computer video files from your DVDs to make them viewable on computers and mobile devices. This software is available for download in the Ubuntu Software Center. You can also use Terminal and install with this command: sudo apt-get install handbrake-gtk.
  • LibreOffice – This is a Microsoft Office alternative that includes programs similar to Microsoft Word, Microsoft Excel, and Microsoft PowerPoint, as well as a drawing program. This software is already pre-installed with Ubuntu.
  • MDADM – This program, combined with the Ubuntu Disk Utility, lets you use RAID to combine multiple drives into one. Install using this command:
    • sudo apt-get install mdadm
  • Pidgin – A chat interface compatible with Google Hangouts, Microsoft Lync, and many other chat services.
  • Plex Server – Lets you store all of your videos, photos, and music files. This software is available for purchase in the Ubuntu Software Center. A more direct route would be to download the installation file from the download page on the Plex.tv website. We have a Plex User’s Guide with a brief introduction to how it works.
  • Samba – When you right click on a folder and choose to create a Network Share for the first time, Linux will prompt you to install the network sharing capabilities.
  • Thunderbird – This is an email client similar to Microsoft Outlook or Apple Mail. It lets you access multiple email services in one place, and download your messages for offline viewing or drafting replies.
  • VirtualBox – Lets you run different operating systems within  your Linux computer, so you can bring up a Windows session to run Windows program. You can follow the command-line installation instructions or use the Ubuntu Software Center.
  • YouTube Video Downloading – To get the YouTube downloader, enter this command in Terminal: sudo apt-get install youtube-dl. To use the downloader, type your request in this format: youtube-dl http://www.youtube.com/VideoNumber (you can use other video site links here as well).

Intuit QuickBooks Error – Intuit Sync Manager: There was an error loading the file from path

Problem Summary

The Sync Manager program included with Intuit Quickbooks may get damaged or accidentally removed. When it does, the following error will appear:

20140918th-intuit-quickbooks-there-was-an-error-loading-the-files-from-the-path

Problem Solution

Follow these instructions to fix the problem.

  1. Exit QuickBooks to make sure it isn’t accessing your company file.
  2. Exit Intuit Sync Manager by right clicking the Sync Manager icon in the System Tray and select Exit Sync Manager from the pop-up menu.
  3. Locate the SyncManager folder and rename it to SyncManager.old. The folder will be found in a different location depending on your version of Windows.
    • Windows 8, Windows 7 and Windows Vista:
      C:\Users\UserName\AppData\Local\Intuit\SyncManager
    • Windows XP: C:\Documents and Settings\UserName\Local Settings\Application Data\Intuit\SyncManager

You can copy and paste the appropriate file folder path location (described above) into your Windows Explorer (not Internet Explorer, but the file viewer for Windows).

Or,  you can browse your folders to find the location, but this will require enabling the viewing of hidden files and folders. Click here to see how to show hidden files and folders.

  1. Start QuickBooks and open Intuit Sync Manager – Sync Manager will automatically recreate the SyncManager folder
  2. Click Sync Now to sync your company data

If this solution does not resolve the issue, you can read discussions and post messages and questions relating to your issue on the Intuit QuickBooks Community site for free. You can contact an agent for additional guidance. Fees may apply.

__________

Source: Intuit Website Document

Smart Phones Overview for Fall 2014

Summary

There’s a fresh lineup of smart phones being released for Fall 2014. The following are some of the front runners with regard to features and performance. Prices shown are for unlocked 64GB models unless otherwise noted. This page will be updated with additional details as available.

Apple iPhone 6 Plus ($750 16GB, $850 64GB, $950 128GB)

These are some highlights for the Apple iPhone 6 Plus.

  • 5.5 Inch Display
  • One touch fingerprint reader
  • Android-like predictive typing (new with iOS8)
  • Android-like voice to text with words appearing as you speak (new with iOS8)
  • Smooth all metal design
  • Larger easy to read fonts (new with iOS8)

Motorola Moto X 2nd Generation ($550 32GB)

These are some highlights of the Moto X.

  • 5.2″ Display
  • Design your own phone option, includes wood design option
  • Pure Android OS without any additional third-party software results in faster, cleaner, more predictable experience
  • Fast charging
  • This phone uses the Android operating system, so it’s possible to connect a full-size desktop display, keyboard, mouse, USB drive, and other peripherals. This makes the phone a potential desktop / laptop replacement.

Samsung Galaxy Note 4 (Prices Not Yet Available)

These are some highlights of the Samsung Galaxy Note 4.

  • 5.7″ Quad HD Super AMOLED (2560×1440 pixel resolution)
  • Super bright and crisp display with wide viewing angle
  • Pen interface
  • Fast charging
  • This phone uses the Android operating system, so it’s possible to connect a full-size desktop display, keyboard, mouse, USB drive, and other peripherals. This makes the phone a potential desktop / laptop replacement.

Plex.tv Media Server Users Guide

Summary

This page offers a brief introduction to the Plex.tv Media Server system. There is plenty of support online for Plex. However, for the beginner it isn’t quite clear how to navigate around the interface, so that’s primarily what this document is for. Some of the instructions on this page are specific to Linux computers, although the Plex Media Server can run on Windows or Apple as well.

Setup Plex Server

The Plex server software can run on just about any computer (Windows, Apple, Linux), but ideally you would pick a computer that isn’t being used for something else. That way you can ensure it will stay up and running all the time, and be dedicated to video services — without taxing the CPU by performing other tasks. Follow these instructions to setup a computer as your Plex server:

  1. On the computer that will be used as your Plex server, visit the Plex.tv website and click the Download menu button.
  2. Under the Plex Media Server heading, click on Computer. This will take you to the download page for computer-based servers.
  3. The website should automatically detect the correct software for your computer. The minimum recommended system specifications will be listed.  Click Download.
  4. With an Ubuntu (Linux) computer, the software installation should begin automatically Install the downloaded software.

Here are some documents with further reading about installing Plex Media Server:

Connect the Server to Your Plex.tv Account

  1. Login. Login to your Plex account (while on the Server computer).
  2. Launch. Click the Launch button in the top right.
  3. Settings. Click the tools icon in the top right for Settings.
  4. Connect. Click the Server menu link and then click the Connect link to get to the login screen. Provide your login information. This will connect your server to the outside world and make it accessible to authorized users.

Note that if you’ve reinstalled the Plex software, mobile devices on the same network may be able to still play content, but computers going through the web interface won’t be able to play content until the server has connected to Plex as described above.

Plex Account

You will want a Plex account. The paid account will let you stream video outside your home for access from mobile devices and sharing with friends. There’s a lifetime membership level at $75 (as of 17 September 2014).

Creating Videos

Software programs like Handbrake let you mobilize your physical video media, so you can have DVDs converted to video files viewable on a computer. So, you can convert your DVDs and Blueray media to computer video files (the same video files like those created by a video camera). You can also put your personally created videos on a Plex server for sharing.

About Media Libraries

Media Libraries are collections of Movies, TV Shows, Music, Photos, or Home Videos. These categories determine how Plex will index and display the media. TV Shows are organized by season and episode. Movies are listed with visuals of their cover art and other information.

  • Prior to creating a media library, you’ll want to organize your content into folders on your hard drive. For example, one folder for Movies and another folder for TV Shows.
  • You can also create folders for groups of Movies, such as all the Lord of the Rings movies. This makes it easier to share just that collection.
  • Plex lets you sort and search on many things, but presently it doesn’t allow organizing movies by genre, so creating genre folders could be helpful.

Creating Media Libraries

When allowing others to access and view media on your Plex server, it’s possible to allow access to all content or only certain Media Libraries. This is why it’s a good idea to use separate folders for Media. For example, it would be possible to group movies by their rating and allow access to different libraries by age group and maturity level. That way your entire video collection isn’t accessible to anyone regardless of age. If you have separate folders for videos by a certain category, rating, sequels, or genre (for example) you can share those as Media Libraries individually. You can also create a Media Library that combines several folders into a single Library listing. Follow these basic steps to setup a Library:

  1. Login. Login to your Plex account (while on the Server computer).
  2. Launch. Click the Launch button in the top right.
  3. Add Library. Click the plus (+) link next to your server name.
  4. Media Type. Choose the type of media.
  5. Name. Give your Media Library a name, such as Movies, or Sci Fi movies.
  6. Folders.  Choose one or more folders to be included in the library. Click Add Library when done. If you’re unable to view folders on your hard drive(s) then follow the instructions below under the heading When Plex Can’t View Folders.

TV Shows Are Different

Because television shows have seasons and episodes, they are managed differently by Plex.

It was suggested above that movies could be grouped into different folder and libraries. For example, putting all Star Trek movies in a single folder. However, in the case of television shows, Plex uses the folder structure and folder names to properly determine the series.

If you point to a television series folder, and within that folder you have Season 1, Season 2, Season 3, etc. Plex won’t know what Season of what show it is so you might get a mismatch.

Since television shows are automatically grouped and organized, there’s no need to have separate television show libraries. Instead, create a single folder with all television shows each having their own folder, and then sub-folders for each season. Then, Plex will automatically setup the library structure and show the proper cover art and other details for each show and season.

When Plex Can’t View Folders

Sometimes in the process of adding folders to your Library, Plex won’t be able to see folders that exist on your drives. Follow these steps to correct the problem:

  1. Run Terminal.
  2. Enter the following command to bring up the settings editor:
    sudo nano /etc/default/plexmediaserver
  3. Use the arrow keys to move down to the bottom of the settings file.  The last setting entry is PLEX_MEDIA_SERVER_USER=plex. Change this to your user account name. Then press Control+X to exit, then Y to save. Notice in the example below, the user account is maintenance. Click the image to enlarge.
    20141008we-plex-media-server-settings-user
  4. Open your Internet browser and enter the following address to initialize the Plex server:
    http://localhost:32400/web/index.html#!/dashboard
  5. Exit your Internet browser.
  6. Return to the terminal and enter the following command to stop the plexmediaserver process:
    sudo service plexmediaserver stop
  7. Enter the following commands to add plex to your usergroup:
    sudo addgroup plex yourusername
    sudo addgroup yourusername plex
  8. Enter the following command to start the Plex Media Server service:
    sudo service plexmediaserver start
  9. Return to your Internet browser and go to http://plex.tv then login with your Plex user account and launch your server window.

When Plex Can’t Play Content

You may get a message stating, “Please check that the file exists and the necessary drive is mounted.” Click the image for a larger view.

20141026su-plex-please-check-that-the-file-exists-and-the-necessary-drive-is-mounted

The drives on your computer exist, and they probably appear to be mounted. This can happen on Linux computers, and with Windows computers that have mapped network drives. Once you click on the drives (on the server), and they open, and you see their contents, then other programs can use them. Until you do this, software will assume the drives aren’t available.

In the window below, you can see several drives are listed under Devices. They have been mounted on startup. Otherwise they wouldn’t be listed here. However the eject symbol is missing on the right. Click the image for a larger view.

20141026su-ubuntu-drives-display-without-eject-symbol

Once you click on a drive, or all the drives, the eject icon will show up and then you know that they are accessible to programs as shown below. Click the image for a larger view.

20141026su-ubuntu-drives-display-with-eject-symbol

When Old Plex Servers Are Still Listed

Sometimes after a Plex server has been deleted it will still show up in the Plex player client. The problem may very well be that your browser cache is retaining the old server information.

Removing and Reinstalling Plex

There’s a support article about this topic and in that article it is suggested that the Plex Media Server software be completely removed and reinstalled as a first step. However, in testing the above steps, it wasn’t necessary to do this to fix the problem. However, each situation is unique, so removal and reinstallation may help in your case. Here are the instructions to do so.

  1. Run Terminal.
  2. Enter the following commands to remove the old installation of the Plex Media Server:
    sudo apt-get remove plexmediaserver
    sudo apt-get purge plexmediaserver
    sudo rm -r plexmediaserver/
  3. Download the appropriate software from the Plex Media Server Downloads page. The installation should start automatically from the Ubuntu Software Center. If not, you could try entering this command:
    sudo dpkg -i plexmediaserver_installation_filename.deb

Here are some documents with further reading about installing Plex Media Server:

Sharing Media Libraries

Follow these instructions to share content from your server with others:

  1. Click on the Servers menu option (top right).
  2. Click the Edit Sharing button.
  3. Anyone you’re currently sharing with will be listed and you can click Edit to select and change what Media Libraries (folders) they have access to.
  4. Under the Share with heading, you can add people using their Plex username or login email address. If you remove the checkmark next to Share All Libraries, a selectable listing of your libraries will show up and you can pick which libraries the person has access to. Click the Share or Save button to finalize.

Deleting a Media Library

If you’re removing or reorganizing folders, you may want to delete a Media Library. Follow these instructions:

  1. Login to Plex.tv
  2. When you hover your mouse to the right of a Media Library name, a pencil (edit) icon will show up. Click the pencil icon.
  3. From the Edit Library menu, you can change view and change many things, including deleting a library. When you delete a library, you’re not removing all the videos. You’re only removing them from the listing.


Computer Workstation Bundle with Intel Core i5

New Egg is currently having a special bundle offer that includes the following:

This bundle was reported on Slick Deals (thanks TP for letting us know) and ends on 14 September 2014. The normal price would be $470, but with the sale price is $329.

A compatible set of components to include with this bundle would be as follows.

20140914su-intel-processors

Logitech HD Pro Webcam C920 with 1080p Widescreen

Logitech C920 Webcam

The Logitech HD Pro Webcam C920 is a good choice for a web cam and offers these features. (Buy Now) Thanks to Makur for contributing to this post.

  • Full HD 1080p video calls on Skype with sharpest video-call picture; HD 720p video calls on favorite IM services like Yahoo! Messenger and Gmail Voice
  • H.264 hardware encoding for faster, smoother HD experiences, OS support- Windows XP x32 / x64, Windows Vista x32 / x64, Windows 7 x32 / x64
  • Carl Zeiss optics with premium 20-step autofocus
  • Snap pro-quality pics; fast upload to Facebook, Twitter and YouTube
  • HD video calls on Windows-based PCs or on any HDTV with HDMI connection from a PC laptop

Webcam Benefits

There are many reasons you might want a separate web cam:

  • Some desktop and laptop computers don’t come with a webcam.
  • For computers that do come with a webcam, the video quality may not be as high as you would like.
  • A separate web cam can have better quality audio recording than a built-in web cam.
  • A separate web cam is more easily adjustable and more convenient that trying to adjust a camera built into a desktop monitor or laptop computer.

Product Photos

Below are photos of the Logitech C920 Webcam.

Google Gmail Responsive Design Flaw

While using Gmail, you may receive an email that has a large embedded (such as 1200 pixels wide). The top of your screen will resize as expected and all account controls will show up.

However, the image will not be resized. As a result, the message window (where the message text shows) will be the full fixed width of the image. This will push the reply button and other controls to the far right beyond your viewable window (unless you’re on a high resolution display).

This problem would not occur if the message was drafted within Gmail, but when email clients are used (such as Outlook or Apple Mail) they may use HTML formatting and set a fixed width for the embedded image.

20140913sa-technology-tips-672x372

Your Apple ID was used to sign in to iCloud via a web browser

If you get a message stating, “Your Apple ID was used to sign in to iCloud via a web browser.”

This is an alert from Apple to inform you that your account has been accessed. It includes the date and time that the account was accessed via the web.

What’s alarming about this message is that the time may likely be sometime late at night or early in the morning when you would not have even been awake.

The reason for the time difference is that the time is stated according to the timezone at Apple’s headquarters in Cupertino. You’ll see PDT next to the date and time in the alert.

As of early 2014, these alert messages may have included more information about the computer used to access the account, such as, “Your Apple ID (yourname@icloud.com) was used to sign in to iCloud on a MacBook Pro 15.”

By mid-2014 it seems that these messages no longer include the computer description.

If you don’t recognize the login as one of your own, it would be a good idea to change your password.

20140913sa-technology-tips-672x372