Motorola Moto G Back Cover Removal

Back Cover Design

The back cover of the Moto G has some exceptional benefits. Along the top and long edges of the phone, where the back cover snaps on, there’s a very tight seal that you’ll have a hard time inserting a fingernail or anything else in. This smooth tight design makes the phone feel smooth in your hand and it keeps out dust and debris.

Back Cover Case Removal

On the bottom of the phone, where the Micro USB connector jack is, it’s possible to insert a small object to twist and separate the back cover from the phone. An ideal object would be something like a wooden clothespin (the side you press with your fingers). This fits in the Micro USB opening and is soft enough not to damage or mar the phone.  You don’t want to jam anything all the way into the Micro USB port. Just twisting 1/16th of an inch inside that opening is enough to open the back cover. Then, using a fingernail, you can carefully pry the rest of the cover off.

20141114fr-motorola-motog-microsd-sim-back-open-case-cover-IMG_0179

MicroSD and SIM Cards

The SIM card is spring loaded. When inserting it, you’ll feel resistance until it’s all the way in, and then as you let go, it will come back and lock in place. To remove it, simply press in with your fingernail to release the lock mechanism and it will come out.

The MicroSD card is held in by friction only. To remove it, use your fingernail to grab the top ridge and pull it directly out.

So, in summary, pull to remove the MicroSD card, but push in to remove the SIM card.

Moto G – MicroSD and SIM Card Installation and Removal

Summary

The Motorola Moto G (Second Generation) smartphone allows for the installation of a SIM card as well as a MicroSD memory storage card in the back of the unit — accessible once the back cover has been removed.

Removing the Back Cover

The back cover of the Moto G has some exceptional benefits. Along the top and long edges of the phone, where the back cover snaps on, there’s a very tight seal that you’ll have a hard time inserting a fingernail or anything else in. This smooth tight design makes the phone feel smooth in your hand and it keeps out dust and debris.

On the bottom of the phone, where the Micro USB connector jack is, it’s possible to insert a small object to twist and separate the back cover from the phone. An ideal object would be something like a wooden clothespin (the side you press with your fingers). This fits in the Micro USB opening and is soft enough not to damage or mar the phone.  You don’t want to jam anything all the way into the Micro USB port. Just twisting 1/16th of an inch inside that opening is enough to open the back cover. Then, using a fingernail, you can carefully pry the rest of the cover off.

20141114fr-motorola-motog-microsd-sim-back-open-case-cover-IMG_0179

MicroSD and SIM Cards

The SIM card is spring loaded. When inserting it, you’ll feel resistance until it’s all the way in, and then as you let go, it will come back and lock in place. To remove it, simply press in with your fingernail to release the lock mechanism and it will come out.

The MicroSD card is held in by friction only. To remove it, use your fingernail to grab the top ridge and pull it directly out.

So, in summary, pull to remove the MicroSD card, but push in to remove the SIM card.

Ubuntu Unity Program Launcher Desktop Dock Gone Missing

If you startup Ubuntu and find that the program icons are missing from the Launcher, and the Launcher itself is also gone, as well as the top-of-screen menu options, this means that something has gone wrong with the Ubuntu Unity desktop. Follow the instructions below to fix the problem. These steps have been tested with Ubuntu 14.04, but should also work with earlier versions.

  1. Press CTRL+ALT+F1, then enter your username and password to go to the command prompt.
  2. Enter this command:
    • sudo apt-get install unity
  3. Enter this command:
    • unity –reset
  4. Press CTRL+ALT+Delete to reset the computer.

You should now see the familiar program icons and menu bar at the top of the screen.

Turbo.264 HD Version 1.2.3

If you’re using Turbo.264 HD version 1.2.2 you’ll want to update to the 1.2.3 version.

What’s new in this release?

  • resolved an issue where the Turbo component was not installed
  • resolved an issue with EyeTV integration that resulted in the Turbo hardware not being used for exports
  • improved file support
  • improved YouTube support
  • improved audio sync on export
  • improved performance and stability
  • improved support for OS X 10.10 (Yosemite)

Installation

After updating to the new version of Turbo.264 HD, please quit and reopen all programs that may have been using Turbo.264 HD, such as EyeTV.

System Requirements

  • a Macintosh computer with an Intel Core processor
  • 512 MB of RAM
  • a built-in USB 2.0 port
  • Mac OS X 10.6.8 or later, Mac OS 10.10 recommended (with all software and security updates installed)
  • QuickTime 7.6 (or later)

Google International Calling Rates Per Minute

Google has some excellent international long-distance calling rates for those using Google Voice. It’s fairly easy to setup Google Voice from your Android smartphone. Some rates are shown below.

20141110mo-google-phone-rates-long-distance-international-calling-cost-per-minute

Home Made Linux NAS vs NETGEAR ReadyNAS

Here are a few reasons you may want to build your own Linux computer and enable file sharing instead of using a NETGEAR ReadyNAS:

  • Cloud Backup – Most consumer and business NAS systems are adequate for serving up files, but don’t have much power for server side processes such as those required by CrashPlan and other cloud synchronization co-location backup services. Using a stand alone computer with file sharing on will allow you to have the system backed up to the cloud for extra assurance.
  • Ease of Use – With a NAS system, you’re restricted to what it will allow you to do through the web interface. Using a desktop computer instead will allow you to have easier control.
  • Expansion – A larger tower computer case can typically have four or five drives installed. In addition, it’s also possible to connect an eSATA drive tower that can hold even more drives for greater expansion. Most NAS systems can’t handle so many additional drives. Having all these drives on a single computer makes it possible to have all that data backed up using a cloud service such as CrashPlan.
  • Recoverability – Let’s say 5 years from now your ReadyNAS has a hardware failure. The only way to get the drives up and running would be to plug them into an identical NAS, but by that time nothing similar would be available.
  • Software – The NETGEAR ReadyNAS connects with an online App Store to install programs. Unfortunately, only a few programs are available. If you’re running a Linux system, you will have thousands of programs available.
  • Speed – The NETGEAR ReadyNAS may take more than a day to prepare four drives for RAID use. By contrast, a Linux computer can prepare the same four drives for RAID use in about 4 hours.
  • Temperature – Most NAS systems are contained in a small box that doesn’t allow for much airflow. Here’s a test you can perform on your own: shut down your NAS system and then remove a drive to feel how hot it is. Although temperature monitors will tell you the temperature, feeling the drive really gives you an idea of how hot the drives get when continuously running and not having adequate airflow. An NZXT brand computer case (for example) has multiple fans and plenty of airflow over all the installed drives. This ensures fewer failures due to overheating.

NETGEAR ReadyNAS Setup

These are the basic setup instructions for using the NETGEAR ReadyNAS. Before starting, you should have already purchased the NAS system and four identical hard drives.

  1. Install drives using the fast and easy drive bay system that requires no tools and no screws for quick swapping of drives.
  2. Power on the ReadyNAS.
  3. Go to ReadyCloud.NetGear.com and click on Discover to find your local ReadyNAS device. Follow the on-screen instructions. Although the ReadyNAS can be setup as only a local NAS, you’ll benefit from having a ReadyNAS cloud account for remote management and access.
  4. You’ll eventually be taken to the web interface control center for your ReadyNAS.
  5. You’ll want to setup the genie+ Marketplace to register your NAS and be able to install additional features. Go to genie.netgear.com and setup an account. This account will also be used as your support login for my.netgear.com.

__________

Note: This document may be updated as further information is available.

Ubuntu File Sharing with Apple

Ubuntu file sharing with Apple computers over a network is fairly easy. Follow these steps.

Right click on the folder you’d like to share.

20141108sa-linux-to-apple-file-sharing-001

Choose Properties, and then click on the Local Network Share tab.

20141108sa-linux-to-apple-file-sharing-002

When you click on “Share this folder” (for the first time) you’ll get a message stating “Sharing service is not installed. You need to install the Windows network sharing service in order to share your folders.”

20141108sa-linux-to-apple-file-sharing-003

Confirm to install the additional software.

20141108sa-linux-to-apple-file-sharing-004

Provide your password to Authenticate.

20141108sa-linux-to-apple-file-sharing-005

Wait for installation to complete.

20141108sa-linux-to-apple-file-sharing-006

20141108sa-linux-to-apple-file-sharing-007

Once the installation is complete, you can share the folder.

20141108sa-linux-to-apple-file-sharing-009

Currently, something odd is happening between Ubuntu 14.1 and Apple 10.10 (Yosemite). It’s believed that Apple has implemented a version of SMB (file sharing) that does communicate properly with Ubuntu. Normally it would be possible to setup the folder to be accessible based on user accounts. However, attempting to login using one of the Linux user account names and password will fail. If you click on the bottom two boxes above, sharing will then work properly.

Apple Instructions

Follow these instructions to access the shared Ubuntu folder.

  1. On the Apple computer, press command+k (or from the Go menu in Finder, choose Go to server).
  2. Type in //ServerName/SharedFolder and press Enter.
  3. Choose Connect as Guest access (for some reason entering a username doesn’t work).

The shared folder should now be accessible.

Apple Time Machine Backup Failure

If you’re using the Apple OS X integrated Time Machine backup software, at some point you’ll likely get an error message stating: “Backup Failed. Time Machine couldn’t back up to ‘your_drive_name'” — where your_drive_name will be the backup drive you’ve assigned.

20141107fr2159-apple-mac-time-machine-backup-error-009

Thinking it must have just been a one-time glitch, you’ll manually run a backup, but that will result in an error as well.

20141107fr2159-apple-mac-time-machine-backup-error-002

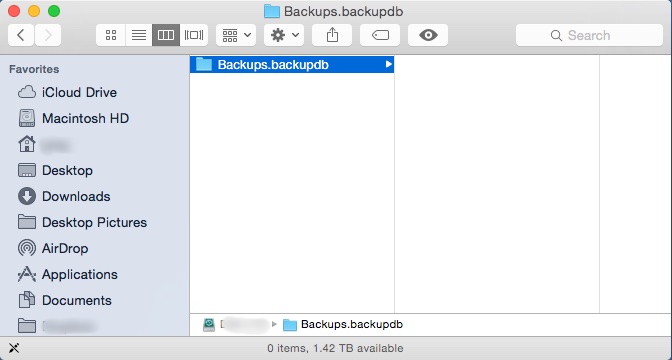
You’ll then check the drive only to discover that although the backup folder exists, its contents are all gone.

20141107fr2159-apple-mac-time-machine-backup-error-001

You’ll panic a little, and then consider using Disk Utility to repair the disk. However, upon running Repair Disk, you’ll get a strange alert that says, “Alert. Some information was unavailable during an external lookup.”

20141107fr2159-apple-mac-time-machine-backup-error-003

After some hair pulling, you’ll figure the only option is to start all over again by formatting (erasing) the drive and doing a complete backup again.

However, when you attempt to erase the drive, you’ll get an error.

20141107fr2159-apple-mac-time-machine-backup-error-005

Problems with formatting a drive can be an indication that the partition is corrupted somehow. So, you’ll take things to the next level and attempt to partition the drive, but that will also result in an error.

20141107fr2159-apple-mac-time-machine-backup-error-004

At this point, assuming that the drive is defective, you’ll throw it in the trash can and purchase a new one.

The Time Machine backup program will work fine with the new drive for a while, but then you’ll get the error again stating the backup failed.

You’ll start all over again at the top of this page and get to this paragraph.

Realizing that the problem is likely not repeated failed hard drives, but something very quirky with Apple OS X, you’ll search the web to see if anyone else is having trouble with Time Machine backups. You’ll discover that Apple has dedicated an entire support page to all the things that can go wrong with Time Machine. Apparently you’re not alone.

20141107fr2159-apple-mac-time-machine-backup-error-006

With a mix of joy and frustration, you’ll see a link titled, “Apple Support article: Time Machine stops backing up to external disk.”

Finally your search is over.

You click the link, but it takes you to a page with an error stating, “We’re sorry. We can’t find the page you’re looking for. Please return to the Apple Support homepage.”

20141107fr2159-apple-mac-time-machine-backup-error-007

Assuming it’s a browser issue, you’ll switch from using Chrome to using Safari, and try visiting the support page again. However, this time, the support page won’t even load.

20141107fr2159-apple-mac-time-machine-backup-error-008

You’ll think to yourself, “Great. Apple’s website doesn’t even work with Apple’s browser.”

At this point you’ll want to write a blog article about the above experience, and switch to Linux.

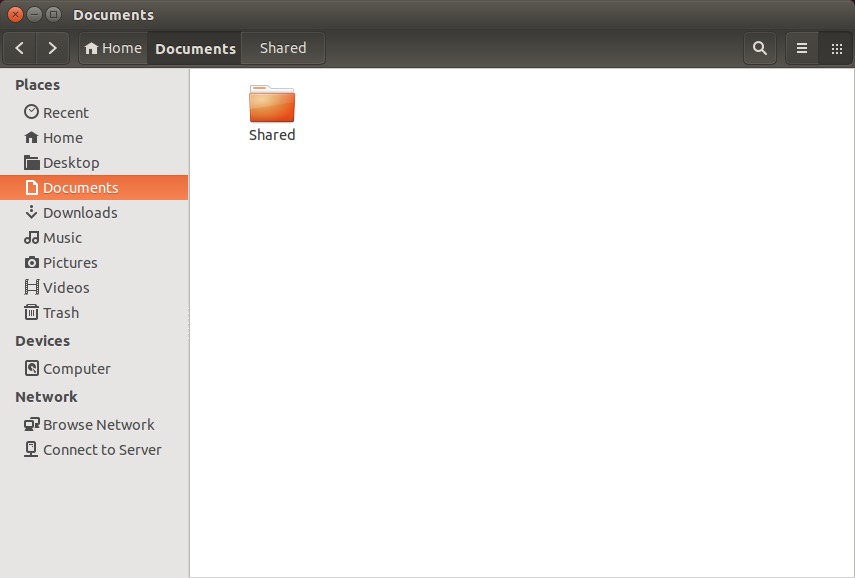
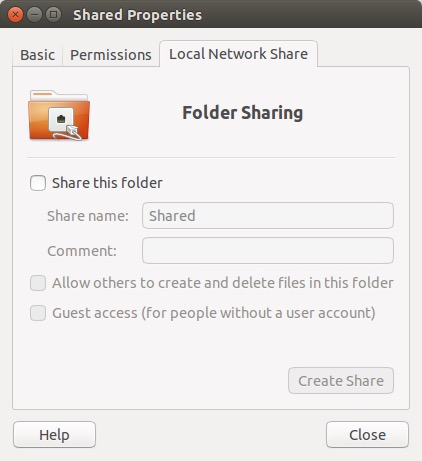
You’ll switch to Linux.

You’ll pull your old backup drive out of the trash can, and out of curiosity, you’ll plug it into your Linux computer to find that it actually isn’t defective, and the files weren’t erased. Unfortunately, Apple’s file system permissions will be set so you won’t have permission to read the files. There’s probably a solution to that, but you’ll save that for another day.

Samsung Fingerprint Reader Design Flaw

Samsung includes biometric security in their premium smartphones through a fingerprint reader on the home button. Unfortunately, the system requires two hands to operate. Holding the phone in one hand and trying to swipe the thumb (for example) typically won’t work. Also, their system only learns a maximum of three fingers.

If fingerprint biometrics is a convenience you’d like, you may want to consider an Apple iPhone.

Apple first introduced biometric security in their iPhone 5S. A really nice feature about the Apple implementation of a fingerprint reader is that you simply need to touch the home button, and it reads your fingerprint — and it does it quite consistently with great accuracy. This means that you can hold the phone with one hand and unlock it — while carrying something, holding hands with your date, or while riding a bicycle (for example).

Apple also allows you to record up to five fingerprints, enough to accommodate those you choose to share your phone with.