Problems with Neat Receipts Cloud Scanning Software

After 14 years of building a very dedicated customer base and the world’s most successful and popular scanning platform, Neat has decided to scrap everything and start over with a new scanning solution. So far, reviews have been less than enthusiastic. Top company leadership are leaving and many employees are being laid off. (source)

This document lists some of the design problems with their new product as it relates to Apple users. This document will be updated over time with any new developments or discoveries.

  1. Apple Version Not Native. Rather than create an actual OS X application, the Apple version seems to have been developed on a non-standard emulator platform similar Adobe Air in the way it looks and feels. To find the program, you’ll look for it in Applications under the letter ‘N’ for Neat, but you won’t find it there. It’s in a folder named The Neat Company. To find it, look in The Neat Company > Neat Smart Organization System > Helium-shell > HeliumAppShell > and there you’ll find the familiar Neat program icon. This is where you’ll have to go if you need to drag the program icon to the Dock again, but don’t touch any of the other exposed program files because the entire fragile system will break down if you do.
  2. Columns Not Adjustable. The new program is broken into three primary columns. The left column shows the folders. The middle column shows the folder contents or the specifics of a particular entry. The right column is a preview window. These columns aren’t sizable or adjustable.
  3. Database Change. The database files are individually stored as PDF files in Documents > NeatScan > your name. Presumably if you mess with any of these files, the database index will be thrown off.
  4. Drag and Drop. In the previous versions of the Neat scanning software, it was possible to drag PDF files into the program and have them added, being scanned for OCR. In the new version, you must manually add files from the file menu.
  5. Item Type. When you change the item type from Document to Receipt (for example) the software goes through the ‘Processing’ step again.
  6. Slowness. To adequately test the speed of the Neat cloud-based scanning software, use a 100Mbps Internet connection, and a quad-core computer with 8 virtual cores, running on a solid state hard drive. When you test with this blazing fast computer, you’ll notice the system is slow to load receipt images — even with a database of only a dozen receipts.
  7. Zoom Issues. When you try to zoom in on a receipt using two finger zoom, the viewer zooms too fast.

Neat Receipts: Starting a New Year

Neat Receipts is a scanning hardware and software solution that integrates cloud services. Over a year or more, the scanning database can grow to over 1GB in size. This can eventually slow down your computer, and cause other problems.

So, it’s a good idea to consider keeping separate Neat Library files for each year. There can only be one default library file, but you can open other library files.

Below are instructions for creating a new Neat Library for a new year.

NOTE: These instructions only work with the older legacy Neat software. Their new cloud-dependent software is entirely different.

  1. Before starting the Neat software, copy the previous year’s library and put it in a folder for the new year giving the file a new name such as Neat Library 2016. It’s also good to have a backup copy of this file in case anything goes wrong, so you may want to put another copy elsewhere.
  2. Set the default library to the file created in step #1 above. Do this by going to the Neat menu, then Preferences. Under the General tab, you’ll find Default Library.
  3. Exit the Neat software.
  4. Start the Neat software.
  5. The recently created library file for the new current year should open as default automatically.
  6. Open the previous year’s file. It will try to synchronize (assuming you pay for the cloud storage). Stop it from synchronizing since you want to only synchronize the current year’s library file. To stop synchronization Double click on sync icon and turn off sync. Then close that file.
  7. Exit the Neat software.
  8. Start the Neat software.
  9. Now when you start Neat, the new year will open. If you open a previous year, it won’t synchronize.
  10. Remove any data from the previous year that still exists in the new year library file. Similarly, you can remove any data in the previous year’s library that belongs in the current year (if you had already started scanning in receipts for the new year while using the previous year’s library).


Mediacom System Maintenance Notification

If you’re a Mediacom customer and subscribe to their Internet service, you may get an HTML message injected into whatever website you visit. They are somehow able to insert their own HTML into whatever site you are viewing. Below is a screen shot showing what this looks like, and here is the actual text of the message:

IMPORTANT: From 5/3/2016 03:00 AM to 5/3/2016 06:00 AM (Central Time) we will be performing maintenance on our Internet systems network. For this reason, during this time, your connection to the Internet may be unavailable or slow. Our maintenance program involves regular system updates and improvements that help make your service experience more reliable and deliver the always fast Internet you expect from us. We apologize for any inconvenience this may cause you, and appreciate your patience and understanding while we work to improve your service experience.

Example

The example below is what a person would see visiting a site like Subaru.com. The message would appear above the website content.

20160419tu0338-mediacom-system-maintenance-notification-notice-message

Mediacom System Maintenance Notification

If you’re a Mediacom customer and subscribe to their Internet service, you may get an HTML message injected into whatever website you visit. They are somehow able to insert their own HTML into whatever site you are viewing. Below is a screen shot showing what this looks like, and here is the actual text of the message:

IMPORTANT: From 4/19/2016 04:00 AM to 4/19/2016 06:00 AM (Central Time) we will be performing maintenance on our Internet systems network. For this reason, during this time, your connection to the Internet may be unavailable or slow. Our maintenance program involves regular system updates and improvements that help make your service experience more reliable and deliver the always fast Internet you expect from us. We apologize for any inconvenience this may cause you, and appreciate your patience and understanding while we work to improve your service experience.

Example

The example below is what a person would see visiting a site like Subaru.com. The message would appear above the website content.

20160419tu0338-mediacom-system-maintenance-notification-notice-message

Apple Mac OS X How to Add / Delete / Remove Speech Voice Time Announcement Files

Introduction

Apple allows many different voice styles, dialects, and languages for the operating system to speak the time on the hour, half hour, or quarter hour. Once added, these additional languages, and their advanced more natural versions, take up a lot of space on the hard drive.

A Google search for instructions on how to remove these languages results in incorrect information that will instruct you to remove system files unnecessarily and permanently delete language options. Once deleted, it won’t be easy to get them back if you ever want them. This document describes the proper method of adding and removing voices.

Setting the Language for Time Announcements

To set your computer to speak the time, click on the time and select Open Date & Time Preferences as shown below.

20160402sa2108-apple-mac-os-x-time-announce-speak-voice-language-001

You’ll be presented with the Date & Time settings screen as shown below.

20160402sa2108-apple-mac-os-x-time-announce-speak-voice-language-002

If you click on Customize Voice you’ll see the voice customization settings as shown below.

20160402sa2108-apple-mac-os-x-time-announce-speak-voice-language-003

When you click on the Voice drop-down menu, you can select from a variety of English voices as well as other language voices (depending on what’s installed and available).

20160402sa2108-apple-mac-os-x-time-announce-speak-voice-language-005

In the list above, some of the highest quality English and Spanish voices are shown as installed.

At the bottom of the list you’ll see an option to Customize. Choosing this option lets you add or remove voices from the speech system. Placing a checkmark next to a voice installs it for use. You can choose standard or high quality voices.

Removing Voice Files

Removing a check-mark after selecting Customize (described above) will let you delete the files associated with that voice.


Square: Here’s Why You Need a Credit / Debit Card Reader (Videos)

Having the ability to receive credit card payments is very helpful — not just for those running a small business, but for anyone wanting to receive a payment from someone. These days people are less likely to carry cash or a checkbook. Cards and smartphones are becoming a more common currency tool.

Merchants sometimes issue refunds, rebates, or rewards on prepaid non-reloadable debit/credit cards. If you’d rather cash out the money, you can use a credit card processing device to get the money into your bank account.

There are several providers of credit/debit card processing readers: PayPalSquareUp, and Intuit (the QuickBooks people).

Square Card Readers

SquareUp (Square) is one of the most popular services and offers a very elegant retail ‘cash register’  with card reader that holds an iPad. There is also a bluetooth reader available for Apple Pay and cards with chips.

Learn More

20160131su-square-squareup-credit-card-processing

SquareUp Videos

The Barbershop Club


Register Overview


Accepting Chip Card Payments with the Square Contactless and Chip Reader

https://www.youtube.com/watch?v=_YTDY1FrC7M


Getting Started with the Square Contactless and Chip Reader


Everything you need to know about EMV (Chip Cards)

Apple Tip: Video Settings to Save Power and Increase Performance

20160401fr0954-special-thanks-to-makur-310x150
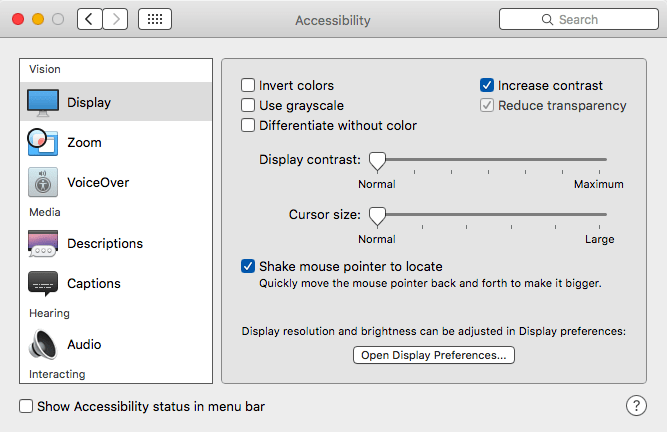
The default video settings for Apple computers are intended to result in an elegant visual presentation.

Transparency and a range of smooth grayscale graphics are designed to enhance the user experience.

However, these features use more power and can slow down your computer.

To change the contrast and transparency settings, go to System Preferences and choose Accessibility. Then enable Reduce Transparency and Increase Contrast.

  • Transparency. The transparency feature uses significant video processing power. This can slow down the computer and use more power.
  • Contrast. When you increased contrast, needed icons and critical visual elements stand out more. This makes it possible to reduce your display brightness slightly without losing visual clarity.

Instructions

See the steps below to make the adjustments.

STEP #1 – System Preferences

20160401fr0942-apple-mac-osx-choose-system-preferences

STEP #2 – Accessibility

20160401fr0944-apple-mac-osx-system-preferences-window

STEP #3 – Reduce Transparency & Increase Contrast

20160401fr0858-apple-mac-osx-video-settings-power-performance-transparency-contrast

Network Solutions Webmail Login Not Working

If try accessing your email by going to the web portal either at mail.yourwebsite.com or at http://www.networksolutionsemail.com you may find that these don’t work.

Instead try this email web portal login link which is based on the NetworkSolutionsEmail.com address but has the additional required URL statements for the login to work.

Here’s the full URL for what seems to be the only working login:

https://www.networksolutionsemail.com/edgedesk/cgi-bin/login.exe?xsl=login.xsl&bind=&tpl=mg_netsol&nodetect=1


Moto G First Time Setup with Motorola Migrate

If you’re setting up a Moto G (2nd Generation) phone for the first time, after entering your language preferences, connecting to a wireless network, and logging into your Google account, you’ll be given an option to migrate all your files and settings from a previous phone to the new phone using the Motorola Migrate app available on the Google Play store.

Here are some general instructions:

  1. Stop Migration First. The Motorola Migrate app will start during the initial setup of the phone. You can actually skip this step for now, and go to the main applications screen.
  2. Update Motorola Migrate. You may need to update the Motorola Migrate program on your recently purchased device. Go to the Google Play store, search for Motorola Migrate, and choose update. The version that ships with your device may be an older version.
  3. Use Local WiFi. The Motorola Migrate application uses your local wireless network to transfer information directly between the phones. So, you will need a local WiFi network — preferably your own personal home network. Connect to your local wireless network.
    • Note: If you’re in an Enterprise environment, or using some other business or WiFi network, it’s likely the migration will fail since firewall and business network switch/router settings may limit this kind of activity.
  4. Migrate Data. Follow the on-screen instructions to migrate your data.


Wi-Fi Phone With Free Unlimited National Calling

Introduction

Wi-Fi calling is the ability to make phone calls from your mobile phone when there is little or no mobile signal. Until recently, people living in areas with poor mobile signal strength had to purchase micro-cell devices at a cost of about $150. These devices would plug into Ethernet and work like a small cell tower in your home. With Wi-Fi calling, it’s possible to make phone calls anywhere there’s a wireless Internet connection, even if no carrier signal is present — like basements or office buildings.

Skype Phone Number – $6 / mo.

Wi-Fi calling has been available for a while in various forms. The Skype app for mobile phones was an early offering that was initially blocked by carriers for use over cellular data because it was seen as a way of circumventing the mobile phone packages that limited the monthly calling minutes. You could still use Skype wherever wireless Internet was available, just not while away from wireless. Eventually, mobile phone carriers began offering unlimited nation-wide calling so cellular data use by VoIP apps was permitted. Skype continues to be a favorite solution for video calling.

A drawback to setting up a Skype phone number is that the available area codes are limited. For example, in Iowa, only 712 (Sioux City) is available. Unless you live in that calling area, people calling from landlines will need to pay long distance fees.

Republic Wireless – $10 / mo.

One of the first innovators to offer wireless calling included in their phone service was Republic Wireless. Initially the cost was $5 per month. That’s now up to $10 per month. With phones starting at about $130, you can have wireless calling as well as a pay-as-you-go cellular phone service.

Google Voice – $0 / mo.

Google Voice is available at no cost for every person who has a free Google account. If you setup an Android phone with the Google Voice app for Android or an iPhone with the Google App for iOS, you get a free phone number in just about any area code you choose. You can then receive and make calls from that number. The phone service includes voicemail and SMS text messaging.

If you’d like to activate the phone with a carrier, you can, but you don’t need to. So, essentially, you can have free phone service, and a free phone number, forever. It will work anytime you’re in range of a wireless Internet connection.

NOTE: Incoming calls can only go to voicemail or be routed to a working phone line. So, if you’re using your Google Voice phone as your only phone, then you’ll need to have people leave a message and then call them back using Google Hangouts.

Making Calls with Google Hangouts.

The instructions below explain how to make a call with the Google Hangouts App. Click this image for a larger view.

20160326sa0559-google-hangouts-voice-placing-making-outgoing-call-app

Best Phones for Google Voice

If you plan to save money by using a mobile phone with or without carrier service activated, here are some great models to choose from. It’s best to choose a model with 16GB or more memory so the phone isn’t running out of room frequently.

  • Motorola Moto G 16GB Global Phone 3rd Generation – $219 on Amazon. This phone looks great and sounds great with dual front facing speakers. It has a fast quad-core processor and includes an FM radio. The smooth design all around is very comfortable to hold. The 5″ screen is an ideal size — not too big, and not too small. The display is super colorful, crisp and bright. As a global phone, it has maximum compatibility and resale value.
  •  Motorola Moto G 8GB 2nd Generation – $99 to $165 on Amazon. The 2nd Generation Moto G is available in 8GB only, but it will save you some money. It has many of the same benefits and features as the 3G. The US model is $99 and the Global model is $165.
  • Unlocked Android Phones on Amazon. There are a variety of unlocked Android phones on Amazon. Unlocked phones have the greatest flexibility and need not be bound to a contract with a particular carrier. Android phones offer the ability to use the Google Play store for apps.
  • Unlocked Apple Phones on Amazon. There are a variety of unlocked Apple phones on Amazon. Unlocked phones have the greatest flexibility and need not be bound to a contract with a particular carrier. The Apple iPhone offer the ability to use the Apple App store which may have more elaborate features than their Android counterparts. Newer models of Apple iPhones have one-touch fingerprint readers which help secure your phone.

Consider an iPod Touch $199

If you’re planning on exclusively using Wi-Fi calling you might consider using an iPod Touch starting at $199 for the 16GB model. The iPod touch offers many great features and it’s super slim and light.

Consider an iPad $269 – $1,400

Like the iPod touch, an iPad would also serve as an excellent phone system with the added advantage of having great computing features for other work. Using cloud storage with Dropbox or Box turns the iPad into a desktop-class file storage system.

AT&T Wi-Fi Calling

Recently AT&T partnered with Apple to allow Wi-Fi calling on new iPhones. This is great news for people who had very poor signal quality in their homes or offices.

20160324th2058-att-wifi-calling-wireless-internet-microcell-mobile-iphone-android