In the video above about email safety and online account security, Fox 28 News interviewed Greg Johnson of Iowa City Technology Services. (source)
As a clarification, in the video it’s stated that you should have a backup email account, otherwise someone could access your friends list. The rest of that statement went on to explain that having a backup email account allows you to have a backup of your contacts as well to notify friends in the event your primary account is hacked.
Also, in the video, Al states “they were able to close my password.” What he probably meant to say is that they were able to guess his password, or otherwise hack into his account, and then change to a new one to lock him out of his account.
Below is some information from the longer interview with Greg Johnson that didn’t make it into the final segment that aired.
Incoming Email Safety
When receiving suspicious or unusual emails from people you know or businesses you know, be careful about clicking links or responding in any way. Try another means of contacting the person. In the case of a bank, store, or other online service, go to the website directly instead of clicking on a link.
Fraudulent emails are very convincing and have the same official appearance as the authentic emails. For example, if you’ve ordered something online, and receive a shipping notice at about the same time, it could be fraudulent. Don’t click on ‘track my order’ links unless you can verify the link will take you to the official shipper’s website.
Online Account Security
Here are some tips that may help avoid having your account hacked, or at least help if it does get hacked.
- Antivirus & Security Software. Pay for a high quality full-featured antivirus security suite software program such as Bitdefender or Kaspersky. This may help prevent having your computer hacked and accounts hacked through keystroke logging. The software can also warn against phishing emails and fraudulent websites.
- Use Only Secure Computers. Don’t use an unfamiliar computer for logging into any accounts because if it’s not secure, your login information could get stolen.
- Alternate Email Account. Have an alternate / backup email account you can use to reach friends and family if your primary account is hacked. This is also helpful in attempting to recover a hacked account.
- Backup Your Address Book. Backup your address book / contacts frequently. Most systems have a way you can export or download your contacts. Sometimes hackers will delete all contacts after accessing an account. They do this to prevent you from easily warning people once you get your account back.
- Backup Your Email Messages. Sometimes when accounts get hacked, the hackers download and/or erase your entire email history. So, use an email client like Outlook or Thunderbird to download a backup copy of your emails. You may also want to delete older messages stored online to avoid letting those get into the hands of hackers. If you plan to delete online messages, be sure they are stored on your computer and also backed up securely to an external drive.
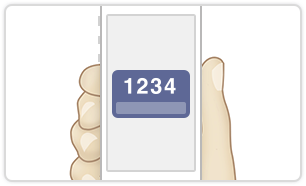
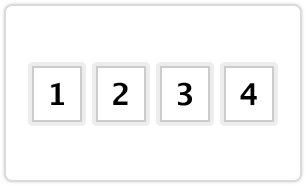
- Two-Step Authentication. Use two-step authentication so that your account is configured to send you a passcode via text message or phone app. This way, even if someone gets your account password, they can’t access your account.
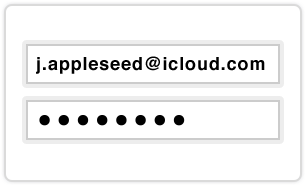
- Use Strong Passwords. Be sure to use complex and difficult to guess passwords.
- Multiple Email Accounts. Using multiple email accounts can be helpful. For example, consider using one account only for banking or other secure needs. Don’t give that email out to people. This way it’s less likely to become a target for spam. Have another account for friends and family, and then a different account for newsletters and other public mailings or listings. Keeping your accounts separate this way helps distribute the exposure and loss. You can make your more secure account require a few more steps to login (see two-step authentication above).
If Your Account Was Hacked
As described above, hackers could download your entire address book and all your emails going back years — including health and banking information. For this reason, it may be best to store email messages offline. If your account has been hacked, here are some considerations and actions you may want to take.
- Check the Away Message. Most email service providers have a vacation or away message that can be configured to be sent out automatically as a reply if you’re away from email. Hackers will sometimes setup a fraudulent auto-reply message. Check to make sure this hasn’t been done.
- Check Your Alternate Email Address. Most email service providers will suggest that you have one or more alternate email addresses on file. Make sure these haven’t been tampered with. If a hacker has added their address, they can get back into your account.
- Check Your Authentication Questions. Most accounts have authentication questions and answers configured for recovering the account. Make sure these haven’t been changed or tampered with.
- Change Your Passwords. Since our email accounts are a gateway to all of our other accounts, it’s conceivable that a hacker could use older saved emails to access online accounts or as a tool for the ‘I forgot my password’ systems to reset passwords on your other online accounts. Consider going through and refreshing your passwords just in case.
- Alert Your Contacts. Often hackers will send out phishing emails or other malicious emails using your account. You can let your contacts know to be careful with any emails received from your account over the past few days or whatever time period your account was hacked.